
Understanding Molds for Wax Casting
The Difference Between Silicone and Plaster Molds
When preparing for lost wax casting, choosing between silicone and plaster molds fundamentally shapes your project’s outcome. Each material serves distinct purposes and offers different advantages.
Plaster molds are the economical choice for lost wax casting. They’re created by embedding your wax sculpture in a plaster mixture, then heating the mold to burn out the wax before pouring molten metal. This method is the cheapest and easiest for hobbyists and small-scale operations. Plaster molds work effectively for casting silver, bronze, and aluminum.
Silicone molds provide reusability and precision. Unlike plaster, silicone molds survive the casting process intact, allowing you to create multiple wax copies from a single master model. This makes silicone ideal for production runs and professional operations where consistency matters.
| Feature | Plaster Molds | Silicone Molds |
|---|---|---|
| Cost | Budget-friendly | Higher initial investment |
| Reusability | Single-use | Multiple uses |
| Setup time | Quick | Moderate |
| Best for | One-off castings | Production batches |
Selecting the Right Mold for Your Casting Project
Your choice depends on three key factors: volume, budget, and precision requirements.
Choose plaster molds if you:
- Are casting individual pieces or small quantities
- Work with limited budgets
- Need quick turnaround times
- Plan to cast metals like silver, bronze, or aluminum
Choose silicone molds if you:
- Require multiple identical castings
- Prioritize consistency across pieces
- Can invest in upfront material costs
- Plan long-term production
For beginners exploring lost wax casting, plaster molds offer immediate accessibility. The materials are everyday items—plaster of Paris, water, and simple containers. The process requires no specialized equipment, making it the natural starting point for learning the craft.
Essential Tools and Materials for Mold Making
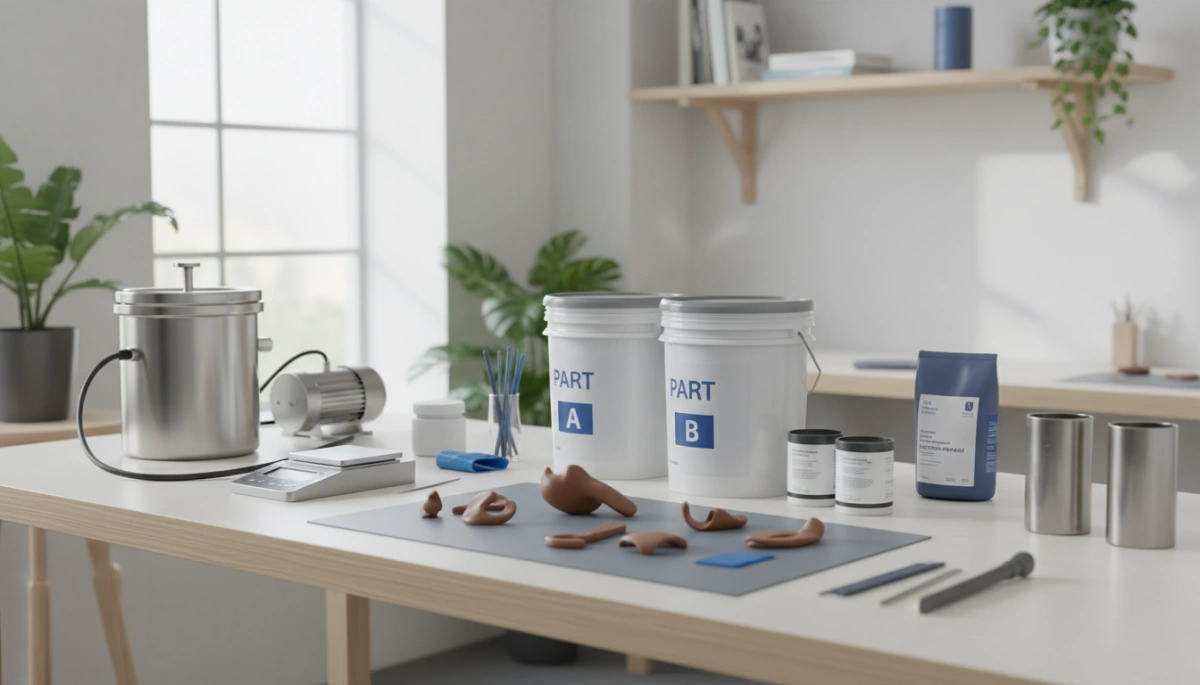
Preparing Your Silicone or Rubber Supplies
When you’re working with silicone molds for wax casting, having the right rubber supplies on hand makes all the difference. You’ll need high-quality silicone rubber that can withstand the temperatures and pressures of your casting process. Before you start, measure out your silicone carefully—most projects require a 1:1 ratio of base to catalyst, though you should always check your specific product instructions. Mix thoroughly but gently to avoid trapping air bubbles, which can compromise your mold’s quality.
Choosing the Best Plaster and Investment Mixtures
For lost wax casting, plaster of Paris is your go-to material, and it’s one of the cheapest options available. The key is getting your plaster mixture right. I use a 2 parts plaster powder to 1 part water ratio, which gives you that smooth, pancake-batter consistency you’re after. Here’s the pro tip that actually works: add your plaster powder into the water rather than the other way around. This simple switch dramatically reduces bubbles in your final mold.
What you need:
- Plaster of Paris powder
- Clean water
- Mixing container
- Stirring tool (wooden spoon works fine)
Setting Up Your Workspace and Mold Boxes
Your workspace setup determines how smoothly your mold-making goes. You’ll need containers to hold your plaster mixture while it sets—plastic bins, aluminum foil molds, or even improvised boxes work perfectly. Make sure your work area is clean and level so your mold sets evenly. Have your wax sculpture ready before you pour, since you’ll need to position it quickly once the plaster reaches the right consistency. Keep paper towels and a damp cloth nearby for cleanup, and ensure good ventilation if you’re working indoors.
How to Make a Silicone Mold for Casting Wax Models
Selecting and Preparing the Master Model
Your master model is the foundation of everything. Start with a clean, detailed wax sculpture or pattern that represents exactly what you want to cast. Remove any dust, debris, or imperfections from the surface—these will transfer directly into your mold. If your model has undercuts or complex geometry, that’s fine; silicone molds handle detail beautifully.
Apply a thin release agent to the master model before molding. This prevents the silicone from bonding permanently to your original piece and makes demolding easier later.
Constructing the Mold Box Correctly
Build a containment box around your master model using materials like plastic, wood, or clay walls. The box should sit about 1–2 inches away from all sides of your model, giving you enough silicone rubber thickness to create a durable, flexible mold.
Position your master model so it sits level and stable inside the box. Secure it with clay or adhesive to prevent shifting during the pour. Make sure the model won’t float or move when you add liquid silicone.
Measuring, Mixing, and Pouring Silicone Rubber
Calculate the volume of silicone you’ll need by measuring your box dimensions and subtracting the master model’s volume. Follow the manufacturer’s mixing ratio precisely—typically a 1:1 ratio by weight for most silicone mold rubbers.
Mix slowly and thoroughly to avoid trapping air bubbles. Pour the silicone in a steady stream from one corner, letting it flow naturally around the model. Tap the box gently to release trapped air. Let the silicone cure fully according to product instructions, usually 24 hours.
Demolding and Extracting the Master
Once cured, carefully remove the box walls. Gently peel back the silicone mold edges and work your master model out slowly. Silicone’s flexibility makes this straightforward—it won’t stick or tear like rigid materials would.
Inspect your finished mold for any tears, thin spots, or defects. A quality silicone mold for casting wax can be reused dozens of times, making it a smart investment for lost wax casting projects and production runs.
How to Make a Plaster Mold for Lost Wax Casting
Mixing the Plaster and Investment Material
Getting your plaster mixture right is the foundation of a solid mold. I use a simple 2:1 ratio—two parts plaster powder to one part water. The key trick that most people miss is adding the plaster powder into the water, not the other way around. This reduces air bubbles significantly, which is critical for clean castings.
Mix by hand until you reach a consistency similar to pancake batter. Tap the container gently on your work surface to release any trapped air bubbles that rise to the surface. This step makes a real difference in your final mold quality.
Imbedding the Wax Sculpture Securely
Position your wax sculpture face down with the sprues pointing upward. The sprues must remain visible on the top surface—they’re your channels for metal flow. The sculpture should hover inside the container without touching the bottom or walls. This suspension ensures even plaster coverage around your piece.
Pour the plaster mixture carefully around the wax sculpture, maintaining that suspended position. Work slowly to avoid trapping additional air pockets.
Allowing Time to Set and Removing the Container
Let the mold cure completely. I always leave mine overnight to ensure it’s fully hardened. Once set, pop the mold out of its container—whether you used a plastic bin or aluminum foil mold box, the removal is straightforward.
The Burnout Process: Baking the Mold
This is where patience pays off. You need to bake the mold to remove trapped moisture before melting out the wax. Heat must be applied very slowly to prevent heat shock and cracking.
Temperature guidelines:
- For standard investment molds: Gradually increase oven temperature to 400°F, then decrease slowly
- For complete wax burnout using a kiln: Gradually increase to 1000°F, then slowly cool overnight
The slow heating process is non-negotiable. Rush it, and your mold cracks. Take your time, and you’ll have a mold ready to cast silver, bronze, or aluminum successfully. The lost wax casting process relies entirely on this burnout stage working correctly.
Scaling Up: Reusable Molds and Mass Production
Best Processes for Wax Injection Molds
Once you’ve mastered the basics of plaster mold creation, moving to reusable molds opens up serious production potential. A wax injection machine lets you pump out consistent wax patterns at scale without redoing the mold each time. The key is getting your mold design right from the start—proper gate placement, uniform wall thickness, and strategic venting prevent defects and keep your castings clean.
The injection process works best when your mold is fully cured and preheated to the right temperature. This ensures the wax flows evenly and cools without warping. You’ll want to dial in your injection pressure and hold time based on your specific wax type and mold geometry. Small tweaks make a huge difference in part quality.
Using 3D Printed Patterns for Mold Making
3D printing has changed the game for pattern creation. Instead of hand-sculpting every master model, you can design patterns digitally and print them in resin or other materials. This approach gives you precision that’s hard to match by hand, plus you can iterate quickly without starting from scratch.
When you use a 3D printed pattern as your master, the mold-making process stays the same—you’re still embedding it in plaster or using silicone. The real advantage is repeatability. Print the same pattern 100 times, and each one is identical. This consistency feeds directly into better casting results across your entire production run.
Transitioning from Beginner to Professional Casting
The jump from hobby casting to production-level work isn’t just about buying better equipment. It’s about standardizing your process. Document everything—mixing ratios, curing times, baking temperatures, injection parameters. What works once needs to work the same way every single time.
Invest in a wax injection process that matches your volume goals. Whether you’re running dozens or thousands of pieces, the right setup saves time and cuts waste. Quality control becomes critical too. Inspect molds regularly, track defect rates, and adjust your workflow based on what you learn. This systematic approach is what separates consistent professionals from inconsistent hobbyists.
Expert Recommendations and Troubleshooting
Preventing Air Bubbles in Plaster and Silicone
Air bubbles are the enemy of quality molds. When you’re mixing your plaster mixture, add the powder into the water instead of the other way around—this simple switch cuts bubble formation dramatically. Stir slowly and deliberately, then tap the container gently against your work surface to release trapped air.
For silicone molds, vacuum degassing works best if you have access to the equipment. If not, pour slowly and let gravity do the work. Tilt your mold box slightly as you pour to create a smooth flow that minimizes air pockets.
Safely Melt and Pour Wax Without Leaks
Wax leaks happen when your mold isn’t fully cured or when temperature spikes too quickly. Always allow your plaster mold to set completely—overnight is ideal. Before pouring molten wax, inspect seams and edges for cracks.
Heat your mold gradually in the oven. Start low and increase temperature slowly to prevent thermal shock. When you’re ready to pour, use a steady hand and pour from a controlled height. Keep your wax at the right temperature—too hot and it’ll seep through; too cool and it won’t fill properly.
Maintaining Reusable Molds for Longevity
Reusable molds demand proper care. After each casting cycle, clean out residue while it’s still warm but safe to handle. Store molds in a dry environment away from direct sunlight, which can degrade silicone over time.
Inspect your molds regularly for wear, cracks, or deformation. If you’re running high-volume production with a wax injection machine, follow the manufacturer’s maintenance schedule closely. Proper storage and handling extend mold life significantly and keep your casting quality consistent across batches.
FAQs
What’s the cheapest way to make a mold for wax casting?
Plaster of Paris is your most budget-friendly option. You’ll need basic materials—plaster powder, water, and a container—making it the easiest and most affordable method for getting started with lost wax casting.
What mixing ratio should I use for plaster molds?
Mix 2 parts plaster powder to 1 part water. The key trick is adding plaster powder into the water, not the other way around. This reduces bubbles and gives you a smooth consistency similar to pancake batter.
How do I position my wax sculpture in the mold?
Place your wax sculpture face down with sprues facing up. The piece must hover above the container’s bottom and sides—it shouldn’t touch the walls. This ensures proper mold formation around your casting wax.
How long does the plaster mold need to set?
Let it cure completely. Leaving it overnight is the safest approach to ensure the mold is fully hardened before the next step.
Why do I need to bake the mold?
Baking removes trapped moisture that could damage your casting. Heat the mold very slowly to prevent heat shock and cracking. For standard investment molds, gradually increase temperature to 400 degrees, then cool slowly. For complete wax burnout using a kiln, gradually reach 1000 degrees before cooling overnight.
What metals can I cast with a plaster mold?
Plaster molds work well for silver, bronze, and aluminum. Aluminum reaches approximately 1100 degrees when liquid, and these molds handle that temperature range effectively.
Can I reuse plaster molds?
Plaster molds are typically single-use for lost wax casting since the wax melts out during the burnout process. For reusable molds, silicone rubber is a better choice.
How do I prevent air bubbles in my plaster mixture?
Add plaster powder into water rather than reversing the order. Stir by hand and tap the container gently to pop surface bubbles before pouring around your wax sculpture.