
Learn mold and cast basics materials and step by step techniques for precise DIY and professional duplication.
The Fundamentals: Understanding Positive and Negative Space
When we talk about mold and cast projects, we are essentially discussing the manipulation of space. As someone deeply embedded in the polymer industry, I see this as a transformation of geometry. To get professional results, you need to stop seeing just the object and start seeing the empty space around it. It all boils down to three primary states of your object.
The Master Model: The Original Pattern
Everything starts with the master pattern. This is your original object—whether it’s a 3D printed prototype, a hand-sculpted clay figure, or an industrial component you need to replicate. In my experience, the quality of your final piece is entirely dependent on this master. Any imperfection here will be duplicated endlessly, so I always advise spending extra time refining the surface finish before you even touch a liquid material.
The Negative: The Mold
This is where the magic happens. The mold is the negative space created by pouring a liquid material—like silicone or a flexible polymer—around your master pattern. Once it cures, this material captures every texture, scratch, and dimension of the original.
- The Goal: To create a perfect reverse image.
- The Result: A cavity that serves as the vessel for production.
The Positive: The Cast
The cast is the final replica. By filling that negative void with your chosen casting material—be it resin, wax, or a thermoplastic—you return the object to its positive state. When you pull the cast from the mold, you should be holding an exact clone of your master model.
Visualizing the Process: Geometry Matters
Before you pour, you have to understand how the geometry interacts with the mold. If you don’t plan for the physics of the material, you will fail.
- Undercuts: These are protruding features or indentations that can lock the master inside the mold. If your material isn’t flexible enough to stretch over these undercuts, you will tear the mold or break the model.
- Parting Lines: This is the seam where two halves of a mold meet. I always plan the parting line carefully to hide it along a natural edge of the object, minimizing the cleanup work later.
Choosing Your Materials: The Chemistry of Creation
Getting the chemistry right is the most critical step in any mold and cast project. The materials you select dictate the level of detail captured, the durability of the mold, and the functionality of the final part. We need to match the viscosity, cure time, and physical properties of both the mold and the casting medium to the project requirements.
Mold-Making Materials (The Flexible Tools)
The mold material acts as the negative, capturing every texture of the master pattern.
- Silicone Rubber: This is the industry standard for high-fidelity reproduction. Silicone rubber molding materials are generally RTV (Room Temperature Vulcanizing) and come in two main types:
- Platinum Cure: No shrinkage and archival quality. It is sensitive to inhibition but lasts for years.
- Tin Cure: More economical and robust against inhibition, but it shrinks slightly over time.
- Polyurethane Rubber: These rubbers are tough and abrasion-resistant, making them ideal for casting concrete or abrasive materials. They are cheaper than silicone but stick to almost everything, so a release agent is mandatory.
- Latex: A one-part liquid rubber used for brush-on molds. It is highly elastic and inexpensive but takes a long time to build up layers.
- Alginate: Derived from seaweed, this is safe for skin and sets in minutes. It is strictly for temporary, one-off molds (like life casting) as it degrades quickly.
Casting Materials (The Final Product)
Once the void is created, we fill it to produce the replica. The choice here depends on whether you need transparency, impact resistance, or heat tolerance.
- Epoxy & Polyurethane Resins: These are the workhorses of the industry. Epoxy resin casting provides superior strength and clarity, making it perfect for encapsulations, though it has a longer cure time. Polyurethane resin is faster-setting and versatile, available in rigid or flexible formulations depending on the desired Shore hardness.
- Wax: Primarily used in the investment casting (lost wax) process. For industrial precision, utilizing an automatic wax machine ensures that the wax patterns are consistent and defect-free before the metal pour.
- Plaster & Gypsum: Rigid, fire-resistant, and porous. These are excellent for making support shells or casting ceramics.
- Low-Melt Metals: Alloys like pewter or bismuth can be cast into high-temperature silicone molds. For more demanding metal parts, combining precision casting and CNC machining ensures the final geometry meets tight tolerances.
Types of Molds: Which Technique Fits Your Project?

Selecting the right mold configuration is the first step in ensuring your mold and cast project succeeds. The geometry of your master model dictates whether you can get away with a simple pour or if you need complex engineering to extract the final part.
Open-Face (One-Part) Molds
This is the most straightforward approach, functioning much like an ice cube tray. It is strictly for objects with a flat back or a surface that does not need to be molded.
- Best For: Wall plaques, coasters, stepping stones, and simple relief sculptures.
- The Process: We pour the casting material directly into the open cavity. Gravity fills the void, and once cured, the part is popped out from the open side.
- Advantage: Fast setup and zero seam lines on the finished face.
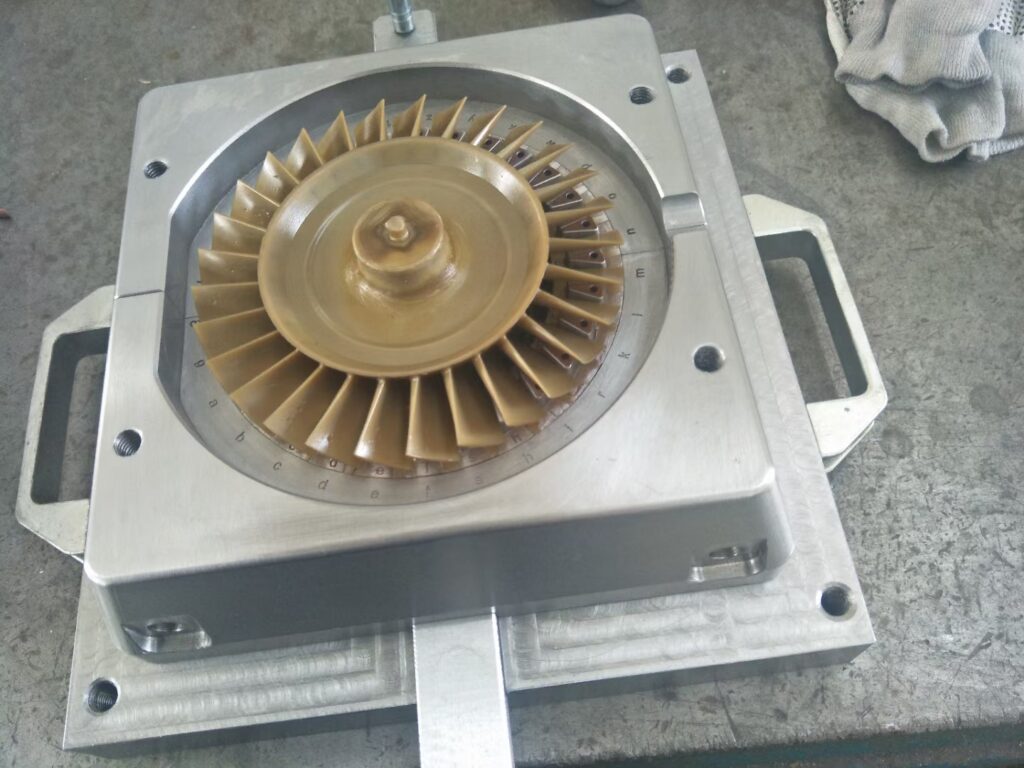
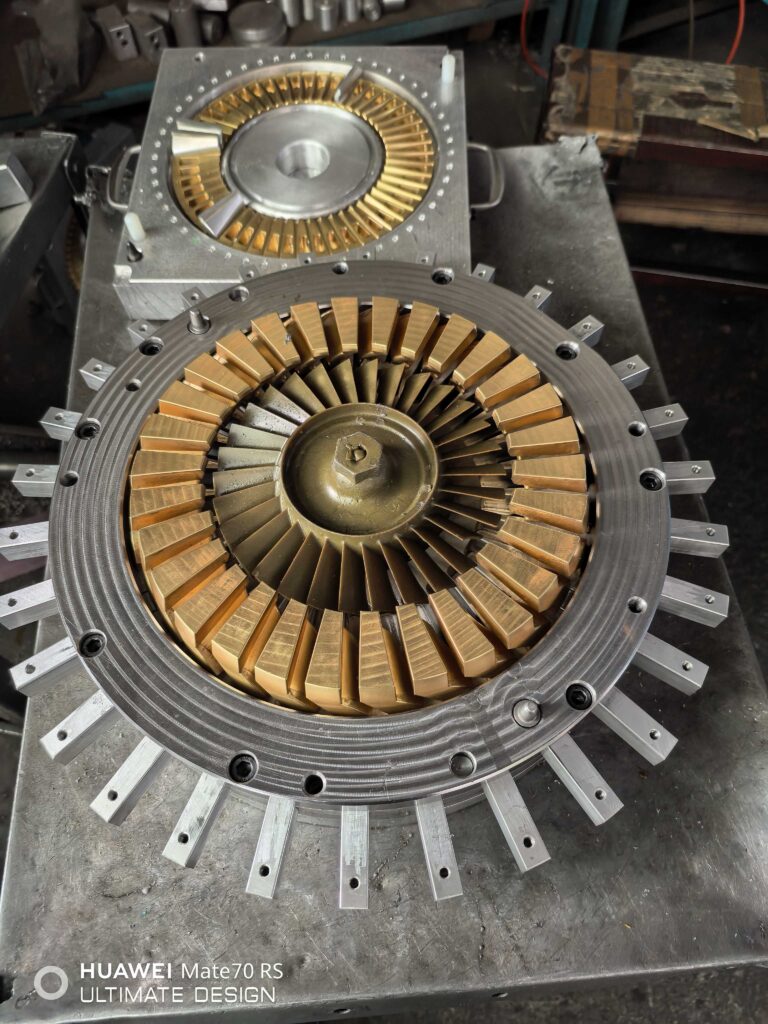
Two-Part (Split) Molds
For fully three-dimensional objects with complex geometries or undercuts, a two-part mold is essential. This method creates a mold in two separate halves that join together during casting and pull apart to release the object.
- The Parting Line: This is the seam where the two mold halves meet. Proper planning is required to place this line where it is least visible or easiest to sand away.
- Industrial Scale: This split-mold concept is standard across manufacturing. For instance, understanding how to make a sand cast mold reveals that even heavy industrial metal casting relies on a similar two-part system (cope and drag) to handle complex shapes.
Injection Molding (Brief Mention)
It is important to distinguish between manual casting and industrial injection molding.
- Casting: Typically uses liquid reactive resins (like epoxy or polyurethane) poured into soft molds (silicone) at room temperature or low pressure.
- Injection Molding: Uses thermoplastic pellets (like our LDPE or EVA) melted and shot into rigid metal molds at extremely high pressure.
- The Verdict: If you are prototyping or making small batches, stick to casting. If you need thousands of identical units, injection molding is the standard.
Step-by-Step Guide: From Master to Replica
Transforming a concept into a physical object requires a disciplined approach to the mold and cast workflow. Whether we are prototyping a single component or setting up for a small production run, following these three phases ensures the final replica remains true to the original design.
Phase 1: Preparation
The quality of the final cast is determined before we even open a container of silicone. The first priority is the master pattern. If the original model is made of porous material like wood, plaster, or 3D-printed PLA, it must be sealed; otherwise, the rubber will grip the surface and ruin the mold.
Once the master is sealed, we construct a mold box around it. This containment wall must be watertight to prevent expensive material from leaking out. Before mixing any chemicals, we apply a suitable release agent to both the master and the mold box. This step is non-negotiable—without it, the mold material may fuse to the model, destroying both.
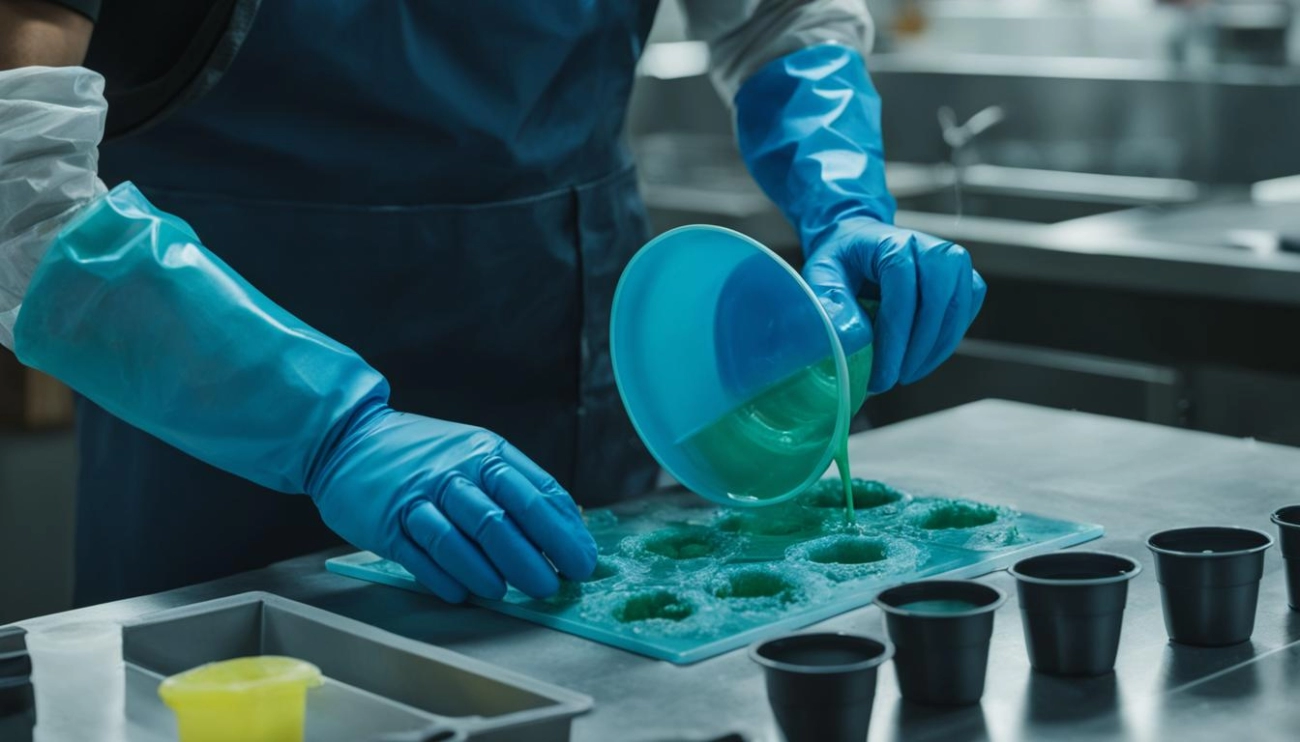
Phase 2: Pouring the Mold
With the prep work done, we move to the mold-making material, typically an RTV (Room Temperature Vulcanizing) silicone or urethane rubber. Accurate mixing is critical here. We weigh parts A and B precisely according to the manufacturer’s ratio.
- Mixing: Stir deliberately to avoid whipping air into the mixture.
- Degassing: To ensure a flawless surface, we place the mixed rubber in a vacuum chamber to expand and burst trapped air bubbles.
- Pouring: We pour the rubber into the lowest point of the mold box, allowing it to rise naturally over the master pattern. This technique pushes air ahead of the material rather than trapping it.
We must respect the material’s pot life vs. cure time. Rushing the demolding process before the chemical reaction is complete can cause permanent deformation.
Phase 3: Casting the Part
Once the mold has cured and the master is removed, we have a negative space ready for casting. We inspect the mold cavity for any debris and apply a fresh coat of release agent if the casting material requires it.
For the casting medium, we might use polyurethane resin, epoxy, or wax depending on the final application. For instance, in precision metal casting workflows, professionals often utilize a wax injection machine for investment casting to fill molds rapidly with high dimensional accuracy. For manual casting, we mix the resin, pour it slowly to minimize turbulence, and allow it to cure. Finally, we carefully demold the replica, trimming any flash or vents to reveal the finished part.
Troubleshooting Common Issues in Mold and Cast Projects
Even with careful preparation, mold and cast processes can run into hiccups. Identifying the root cause of defects is the first step toward consistent, high-quality replicas. Whether you are working with flexible rubbers or rigid plastics, understanding these common pitfalls saves time and material.
Eliminating Bubbles
Air entrapment is the most frequent enemy of a clean surface finish. Bubbles often occur when air gets whipped into the mixture or trapped against the model surface during the pour.
- Vibration: For minor surface bubbles, placing the mold on a vibrating table helps rise air to the top before the material sets.
- Pressure Pots: For a flawless, bubble-free casting, especially with clear resins, curing inside a pressure pot is the industry standard. This compresses microscopic bubbles until they are invisible to the naked eye.
Preventing Cure Inhibition
If your silicone rubber remains sticky or uncured against the model surface, you are likely facing cure inhibition. This chemical reaction prevents the RTV (Room Temperature Vulcanizing) silicone from setting properly. Common culprits include sulfur-based clays, latex gloves, or unsealed porous surfaces. Always test a small amount of material against your master model before committing to the full pour.
Avoiding Mold Tearing
Tearing usually happens during demolding when the material cannot stretch enough to release from undercuts. This is often a mismatch between the geometry and the Shore hardness (durometer) of the mold material.
- Complex shapes: Use a softer, more flexible rubber (lower durometer) that can stretch around deep undercuts without ripping.
- Simple blocks: Higher durometer rubbers offer better stability for flat or simple forms.
Minimizing Flash at the Seam
Flash is the thin, unwanted fin of material that leaks out between the two halves of a mold. This occurs when the mold halves aren’t clamped tightly enough or if the parting line is uneven. Ensuring perfectly flat mating surfaces and using adequate mold straps or rigid support shells helps keep the seam tight. Just as precision is key in wax injection troubleshooting, proper mold alignment prevents excess material cleanup later.
Safety and Workspace Setup for Mold and Cast
When we dive into mold and cast projects, safety is the foundation of a successful workflow. Working with chemicals like epoxy resin, polyurethane resin, and various mold-making materials requires a disciplined approach to protect yourself and ensure the integrity of your materials. We treat our workspace setup with the same rigor used in industrial manufacturing to prevent accidents and wasted material.
Ventilation and Air Quality
Many casting resins and rubbers release Volatile Organic Compounds (VOCs) during the mixing and curing stages. Never work in a confined space without adequate airflow.
- Active Ventilation: Use exhaust fans to pull fumes away from your workspace and out of the building.
- Respirators: For materials with strong odors or harmful vapors, a NIOSH-approved organic vapor respirator is essential to protect your lungs.
PPE Essentials
Personal Protective Equipment (PPE) prevents direct contact with irritants and ensures the chemical reaction proceeds correctly.
- Nitrile Gloves: Always use nitrile gloves rather than latex. Latex contains sulfur, which can cause cure inhibition in platinum-cure silicone rubber molding, leaving your mold sticky and unusable.
- Eye Protection: Safety glasses or goggles are non-negotiable to protect against accidental splashes while pouring or mixing high-viscosity liquids.
- Protective Clothing: Wear an apron or shop coat to keep sticky resins off your skin and clothes.
Temperature Control and Environment
Your workspace environment directly impacts the chemistry of your materials. Most mold and casting products are formulated to cure optimally at room temperature (around 70°F – 73°F).
- Heat Accelerates Curing: High temperatures drastically reduce pot life, giving you less time to mix, degas, and pour before the material sets.
- Cold Slows Curing: Low temperatures can extend cure time significantly or prevent the material from fully hardening.
Maintaining a stable environment is crucial for consistent results. Just as strict process control in investment casting for defect-free precision is vital in heavy industry, managing your workshop’s temperature ensures your cast mold projects turn out defect-free every time.