The Wax Injection Process in Investment Casting
The Role of Wax Injection in Casting Precision
The foundation of a high-quality casting lies in the initial wax pattern. Precision in this stage is not merely about filling a mold; it requires the exact calibration of thermal and mechanical variables. Successful wax injection troubleshooting relies on understanding the interplay between wax temperature, injection pressure, and flow rate. When these parameters are balanced, the process yields dimensionally accurate patterns with smooth surface finishes. Deviations, such as improper pot temperatures or inconsistent pressure, directly result in defects like flow lines, sink marks, or non-fills, necessitating immediate process adjustment to reduce scrap rates.

Essential Tools and Equipment for Injection Waxing
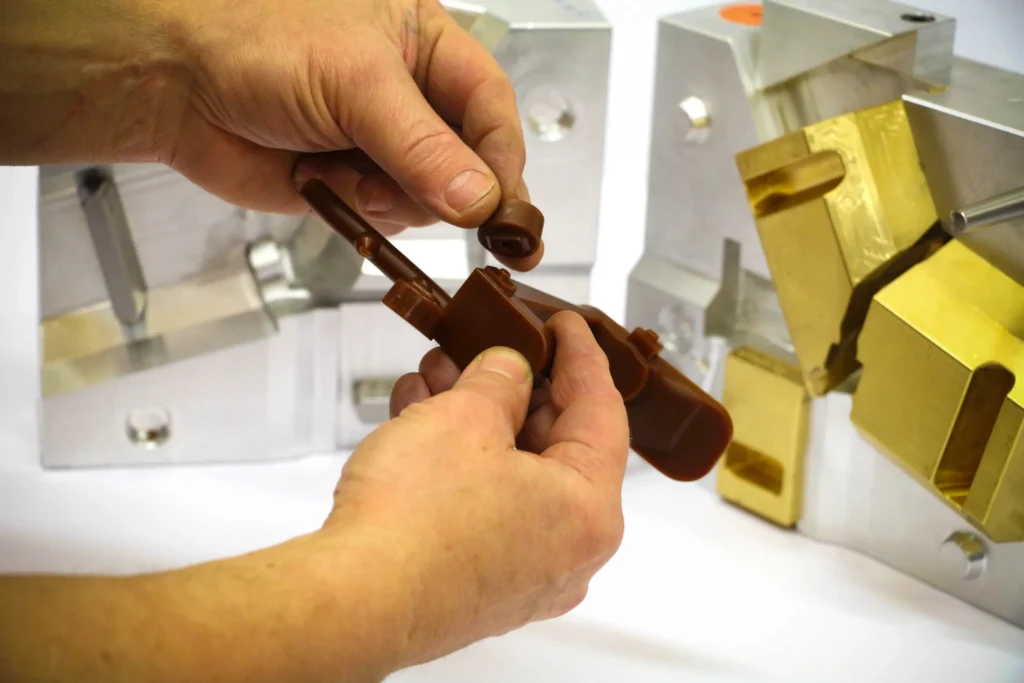
To maintain process control and troubleshoot effectively, operators must monitor specific components of the injection system. The integrity of the equipment directly impacts the quality of the wax pattern. Key elements include:
- Wax Pot and Reservoir: Must maintain a consistent wax temperature with proper agitation to prevent air entrapment.
- Injection Nozzle: Requires precise temperature control and proper alignment with the die to prevent freezing or leaking.
- Die (Mold): Must feature adequate mold vents to allow air escape and be kept clean of excess lubricant or debris.
- Clamping System: Essential for maintaining sufficient clamp pressure to prevent flashing during the injection cycle.
Manual vs. Automatic Wax Injection Machines
Whether utilizing manual operation or fully automated systems, the core requirement for defect-free patterns is consistency. In manual setups, operator technique significantly influences the injection flow rate and dwell time. Automated machines offer superior repeatability but require rigorous calibration of injection pressure and cycle timing. Regardless of the equipment type, the troubleshooting logic remains the same: if the wax temperature is too low or the pressure is insufficient, the pattern will suffer from non-fill or flow lines. Ensuring the nozzle seat is undamaged and the die faces are parallel is critical for both systems to prevent dimensional distortion.
Critical Parameters for Successful Wax Injection
Achieving a perfect pattern requires balancing several interacting variables. As an injected wax machine manufacturer and supplier, we understand that even the highest quality wax will fail if the machine settings do not match the mold geometry. Troubleshooting effectively means isolating these variables—temperature, pressure, and flow—and adjusting them systematically.
Optimizing Wax and Mold Temperature
Temperature control is often the first place to look when defects occur. The process relies on the thermal relationship between the wax pot, the nozzle, and the die (mold) itself.
- Wax Temperature: If the wax temperature is too high, the material expands excessively, leading to shrinkage or “sinks” as it cools. Conversely, wax that is too cold resists flow, causing non-fill or visible flow lines.
- Nozzle Temperature: This must be maintained to prevent the wax from freezing before it enters the sprue.
- Die Temperature: A cold mold can shock the wax, creating surface defects like frosting. Warming the die often helps the wax flow smoothly into thin sections.
Our precision wax injection machines are designed to maintain stable thermal profiles, ensuring that the wax remains at the optimal viscosity from the pot to the mold cavity.
Injection Pressure and Mold Packing Dynamics
Pressure determines how effectively the wax fills the cavity and picks up detail. There is a critical balance between the force used to inject the wax and the force used to keep the mold closed.
- Injection Pressure: Low pressure results in incomplete patterns (non-fill). Excessive pressure can force the mold halves apart, causing “flash” or excess material on the parting line.
- Clamp Pressure: This must always exceed the injection force. If the clamp pressure is too low, the hydraulic force of the entering wax will open the die, destroying dimensional accuracy.
Using specialized wax injection equipment allows operators to fine-tune these settings, ensuring the mold is packed densely without damaging the tooling or the pattern.
The Importance of Mold Filling Speed
The rate at which wax enters the mold, known as the flow rate, directly impacts surface finish and air entrapment.
Flow Rate Effects
| Setting | Potential Defect | Cause |
|---|---|---|
| Too Fast | Air Entrapment / Bubbles | Turbulence traps air inside the mold cavity. |
| Too Slow | Flow Lines / Cold Shuts | Wax cools and hardens before the mold is completely full. |
Adjusting the flow rate helps manage how the wax displaces air within the die. Proper venting combined with controlled flow ensures that air escapes through the mold vents rather than becoming trapped in the pattern.
Troubleshooting Common Wax Pattern Defects
As an injected wax machine manufacturer and supplier, we know that identifying the root cause of a defect is the first step toward a perfect casting. Systematic troubleshooting allows operators to isolate variables like temperature, pressure, and mechanical settings to reduce scrap rates effectively.
Managing Trapped Air and Internal Bubbles
Air bubbles trapped within the pattern or on the surface can compromise the structural integrity of the final cast. This issue often stems from turbulence in the wax delivery system or poor ventilation in the tooling. If the wax level in the pot is too low, air may be drawn into the cylinder or hose. Similarly, improper agitation can whip air into the molten wax before it even enters the mold.

To resolve air entrapment, consider these adjustments:
- Check Wax Levels: Ensure the reservoir is sufficiently filled to prevent air intake.
- Adjust Agitation: Reduce the mixing speed if the agitator is creating a vortex that introduces air.
- Inspect Mold Vents: Clear any clogged vents or add parting line vents to allow trapped air to escape during injection.
- Reduce Flow Rate: High turbulence caused by excessive flow speed can trap air; slowing the injection rate often helps.
Correcting Non-Fill and Partial Mold Filling
Non-fill, or misrun, occurs when the wax fails to completely fill the die cavity, leaving gaps or missing features. This is primarily a thermal or pressure issue where the wax solidifies before it reaches the extremities of the mold. If the wax temperature is too low at the pot or nozzle, the material loses fluidity too quickly.
Address non-fill defects by verifying the following:
- Increase Temperatures: Raise the temperature of the wax pot, nozzle, or the die itself to keep the wax fluid longer.
- Boost Injection Pressure: Increase the pressure to force wax into thin sections and complex details before it sets.
- Check Flow Rate: A slow flow rate allows the wax to chill prematurely; increasing the injection speed can help fill the cavity faster.
- Verify Supply: Ensure the nozzle is correctly aligned with the die and that there is no blockage restricting the flow.
Preventing Flow Lines and Surface Ripples
Flow lines appear as visible ripples or folds on the surface of the pattern, indicating that the wax was cooling and starting to set while it was still flowing. This creates a layered appearance rather than a smooth, continuous surface. Ensuring a high-quality surface finish at this stage is crucial for the success of subsequent steps, such as the automated shell coating application, where surface imperfections can be amplified.
To eliminate flow lines, focus on thermal management and flow dynamics:
- Raise Die Temperature: A cold mold sucks heat out of the wax too fast; warming the die helps maintain flow.
- Increase Flow Rate: Speeding up the injection ensures the mold fills before the wax begins to skin over.
- Adjust Air Pressure: If using a pneumatic system, ensure the pressure is consistent to maintain a steady stream of wax.
- Enlarge Nozzle: In some cases, a small nozzle orifice restricts flow; using a larger nozzle or sprue can improve fill dynamics.
Addressing Dimensional and Structural Issues
Reducing Excessive Pattern Shrinkage and Sink Marks
Dimensional accuracy is non-negotiable in investment casting. When we encounter shrinkage or sink marks on a pattern, it usually indicates that the wax is contracting significantly as it cools without enough compensation. The primary culprit is often high wax temperature; if the wax is too hot entering the mold, the volume change during solidification is drastic. To fix this, we lower the temperature of the wax pot or nozzle.
Another critical factor is injection pressure. If the pressure is too low, the wax isn’t packed tightly enough against the mold walls to counteract shrinkage. Increasing the injection pressure helps maintain the pattern’s shape. Additionally, insufficient dwell time (chilling time) can cause sinks because the center of the pattern hasn’t fully solidified before removal. Extending the dwell time ensures the wax is stable. Our technical advantages in process control help operators dial in these parameters to eliminate cavitation and sinks effectively.
Eliminating Pattern Flashing and Mild Overfills
Flashing occurs when excess wax escapes the mold cavity, typically forming a thin fin along the parting line. This defect not only wastes material but also requires labor-intensive cleanup. The most common cause is an imbalance between pressures: the injection pressure is too high, forcing the mold halves apart, or the clamp pressure is too low to hold them shut. We recommend lowering the injection pressure or increasing the clamp pressure to secure the die.
Physical die issues also cause flashing. If the die faces are damaged, worn, or obstructed by dirt and old wax, the mold cannot seal properly. Routine cleaning and inspection of the die faces are essential. Ensuring the nozzle tip is properly seated against the die is also critical; misalignment can cause pressure leaks that result in external flashing.
Preventing Brittle Patterns and Cracking
Patterns that crack or break during removal are a sign of improper thermal management. Often, this happens because the pattern was left in the mold too long. Excessive chilling time causes the wax to become brittle and lose the slight flexibility needed for demolding. Reducing the dwell time allows the pattern to be removed while it still has enough elasticity to withstand the ejection force.
Conversely, if the wax is injected at too low a temperature, it may already be near its brittle point upon entering the die. slightly increasing the wax temperature can improve the material’s structural integrity. As we are injected wax machine manufacturer and supplier, we emphasize that consistent cycle times and temperature monitoring are the keys to preventing structural failure. Our range of products is designed to maintain these variables within tight tolerances, ensuring robust patterns every cycle.
Solving Surface Quality and Texture Problems
When dealing with wax injection troubleshooting, surface finish is often the biggest headache. If the wax pattern has a rough surface, the final metal casting will too. As We are injected wax machine manufacturer and supplier, we know that achieving a smooth “glass-like” finish requires balancing temperature, pressure, and mold condition.
Causes and Fixes for Surface Pitting and Roughness
Surface pitting usually looks like tiny pinholes or a generally rough texture on the wax pattern. This is often caused by air getting trapped against the die wall or the wax solidifying too quickly before it fully wets the mold surface.
- Trapped Air: If the air pressure or injection speed is too high, the wax enters turbulently, trapping bubbles. Ensure your mold vents are clean and positioned correctly to let air escape.
- Cold Wax: If the wax temperature is too low, the wax chills instantly upon contact with the mold, creating a microscopic gap that looks like roughness. Slightly increasing the temperature usually helps.
- Die Condition: A dirty die or one with built-up residue will transfer that texture to the wax.
Preventing Sticky Patterns and Mold Distortion
Sticking is a nightmare because it leads to pattern distortion during removal. If you have to fight to get the pattern out, dimensions will be off. This usually happens when the process runs too hot.
- Overheating: If the die or wax is too hot, the wax remains tacky. Lower the wax temperature or increase the cooling time.
- Vacuum Issues: sometimes a vacuum forms behind the pattern. Using an air-eject system helps break this seal without force.
- Premature Removal: Pulling the pattern before it has sufficient green strength causes warping. Increase the dwell time under injection pressure to ensure the pattern is solid.
Effective Use of Mold Release Agents and Silicon Sprays
Mold release agents are essential, but they are easily misused. The goal is a microscopic barrier, not a slippery pool. Over-application is a leading cause of surface defects like flow lines or “orange peel” textures.
- Apply Sparingly: Use a light mist of silicon spray. If you see liquid running down the mold face, you have used too much.
- Wipe Down: After spraying, it is often best to wipe the mold with a soft cloth to leave just a thin film.
- Consistent Equipment: To minimize these variables, using high-quality wax injection equipment ensures that pressure and temperature controls remain stable, reducing the heavy reliance on manual sprays.
By controlling these variables, you prevent the most common surface defects and ensure your patterns are ready for the shelling process.
Best Practices for Wax Maintenance and Process Control
Achieving zero defects in investment casting requires more than just fixing problems as they arise; it demands a proactive approach to process variables. By standardizing how you handle materials and equipment, you can eliminate the root causes of common defects like flow lines, shrinkage, and air entrapment before they ruin a batch.
Proper Wax Storage and Handling to Prevent Contamination
Contaminants and improper handling are silent killers of pattern quality. Based on standard troubleshooting protocols, maintaining the integrity of your wax supply is critical for preventing surface imperfections and internal defects.
- Monitor Wax Levels: Never let the wax level in the pot drop too low. This is a primary cause of air entrapment, as the pump begins to suck in air along with the wax.
- Controlled Agitation: While agitation is necessary to keep the temperature even, excessive mixing can introduce air bubbles into the material. Adjust your agitation speed to ensure a consistent blend without creating turbulence.
- Temperature Consistency: Drastic fluctuations in wax temperature between the storage pot and the injection nozzle often lead to flow lines or frosting. Ensure your reservoir maintains a steady thermal state.
Routine Maintenance of Wax Injection Machines
As We are injected wax machine manufacturer and supplier, we know that mechanical precision is just as important as the wax itself. Neglected hardware leads to physical defects that no amount of parameter tweaking can fix.
- Nozzle Inspection: A damaged or burred nozzle tip prevents a proper seal against the die, leading to leaking and pressure loss. Regularly inspect the nozzle radius and replace it if it shows signs of wear.
- Platen Alignment: If your machine’s platens are not parallel, or if the clamp pressure is insufficient, you will experience flashing (excess wax) on the pattern parting lines.
- Clean Die Faces: Residual wax or debris on the die faces prevents the mold from closing tightly. Routine cleaning ensures the die seats correctly, maintaining dimensional accuracy.
For operators facing persistent mechanical inconsistencies, our technical support resources provide guidance on machine calibration and troubleshooting.
Step-by-Step Quality Control for Consistent Patterns
Establishing a strict quality control checklist ensures that every cycle runs within the optimal window. This involves monitoring the interaction between thermal and mechanical forces.
- Verify Venting: Check mold vents for clogs. Inadequate venting traps gas, causing non-fill defects or bubbles at the furthest points of the pattern.
- Calibrate Pressures: Balance your injection pressure against the clamp force. If air pressure or hydraulic pressure is too high, it forces the mold open (flash); if too low, the pattern shrinks or fails to fill.
- Check Temperatures: Use an external probe to verify that the wax temperature at the nozzle matches your controller’s readout. Even a few degrees of deviation can cause sink marks or brittle patterns.
- Inspect Alignment: Ensure the nozzle is perfectly aligned with the sprue seat to prevent flow restriction.
You can learn more about our manufacturing capabilities and how we ensure equipment precision at our factory overview.