
2026年11月14日
Master the investment casting shell building process with expert guidance on dipping stuccoing drying defects and automation
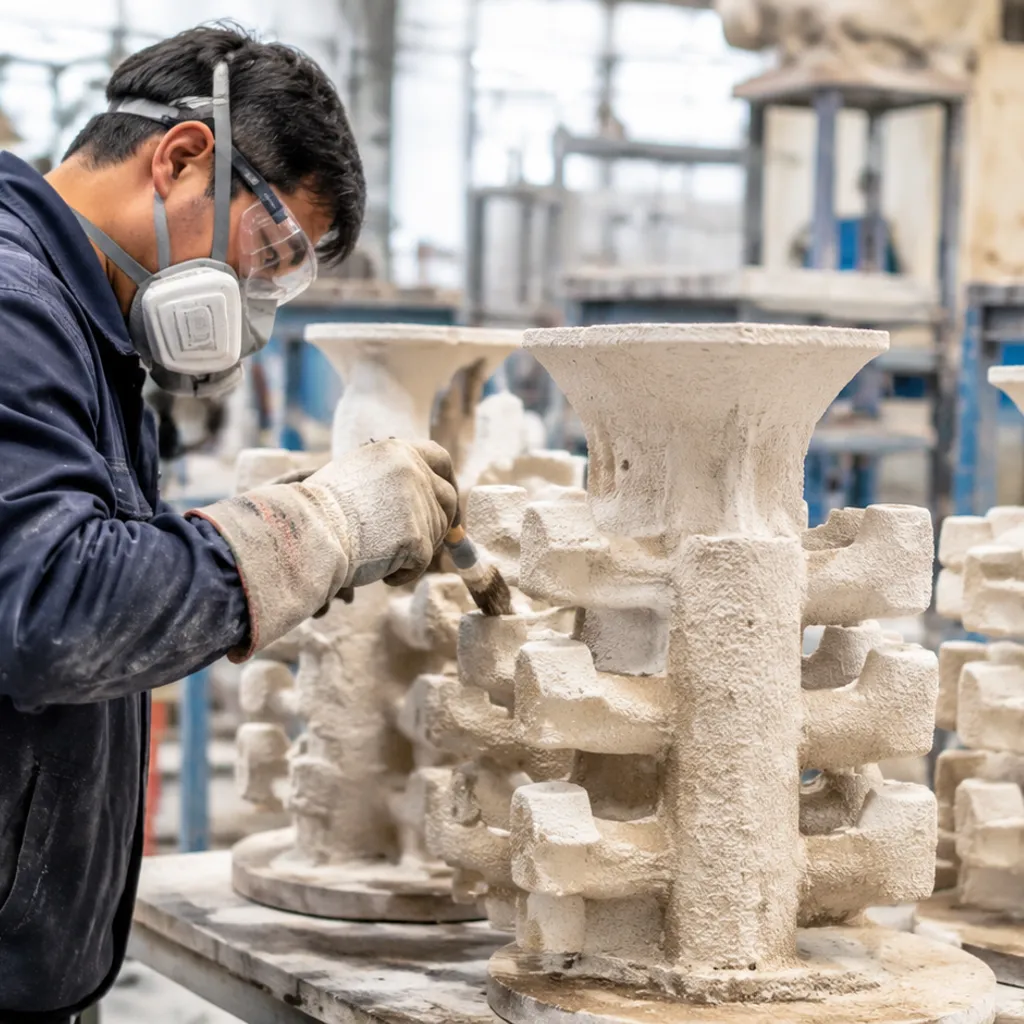
Core Objectives of the Investment Casting Shell Building Process
The ceramic shell building phase converts a sacrificial wax assembly into a robust, high-precision refractory mold. In the investment casting shell building process: dipping, stuccoing and drying, every operational step directly determines whether the mold can survive molten metal casting. A successful shell must meet five fundamental technical objectives:
- High-Fidelity Surface Replication: The primary layer must reproduce the exact contours, micro-details, and surface finish of the wax pattern without pinholes, bubbles, or pattern wetting defects.
- Mechanical Strength: The shell requires sufficient green strength to survive steam autoclave dewaxing and high fired strength to withstand metallostatic pressure during pouring.
- Thermal Shock Resistance: The finished ceramic structure must handle rapid thermal cycling—from room temperature to preheat furnaces exceeding 1000°C—without spalling, micro-cracking, or catastrophic failure.
- Controlled Permeability: The layered refractory matrix must allow core gases and displaced air to escape freely during metal entry, preventing gas entrapment, non-fill, and casting porosity.
- Dimensional Stability: The mold must resist deformation, creep, and uneven thermal expansion across all axes to maintain tight dimensional tolerances in the finished casting.
Step 1: Slurry and Wax Assembly Preparation
Before we start building any layers, both the wax tree and the refractory slurry need to be prepped to strict benchmarks. Skipping tight controls at this baseline stage leads directly to shell delamination, inclusions, and ruined castings later in production.
Wax Tree Degreasing and Surface Prep
Wax patterns naturally carry release agents, oils, and static charge from the assembly bench. Left untreated, liquid refractory slurry will bead up instead of wetting the pattern uniformly. Cleaning: We thoroughly wash the assembled wax cluster in an environmentally controlled degreasing solution to remove residual mold-release agents. Etching/Rinsing: A mild chemical wash optimizes surface tension, allowing the primary slurry coat to adhere smoothly across delicate fillets and tight slots. Drying: Patterns must dry completely before the first dip; any residual moisture or solvent causes immediate coating rejection.
Slurry Mixing and Conditioning
A durable ceramic mold relies on an evenly dispersed refractory suspension. When formulating slurries meant to withstand the high firing temperatures of a burnout furnace for silica sol shells, binder chemistry and flour consistency are paramount.
| Parameter | Primary Slurry | Backup Slurry |
|---|---|---|
| Binder Type | Colloidal silica | Colloidal silica |
| Refractory Flour | Fine zircon or fused silica | Coarse fused silica or mullite |
| Viscosity Target | Higher (Zahn #4 / #5 cup standard) | Moderate (Zahn #3 / #4 cup standard) |
| Agitation | Continuous low-shear rotation | Continuous mechanical stirring |
- Continuous Agitation: Slurry tanks run uninterrupted to prevent refractory particles from settling out.
- De-aeration: We allow newly mixed tanks to rotate until entrapped air bubbles escape completely. Trapped air on the first coat creates ceramic nodules and surface pits on the final metal parts.
- Viscosity & pH Monitoring: We check slurry viscosity and binder pH multiple times per shift to offset natural evaporation and keep flow characteristics uniform across production runs.
Step 2: Slurry Dipping — Achieving Complete Coverage
In the investment casting shell building process: dipping, stuccoing and drying work in continuous synergy, but dipping is where precision starts. We submerge the assembled wax pattern into a liquid refractory slurry to form an unbroken, void-free ceramic skin over every contour of the part.
Achieving a uniform coat demands careful control over pattern manipulation, slurry dynamics, and viscosity.
The Two Types of Dipping Layers
- Primary Face Coat: This initial dip directly touches the wax and defines the casting's final surface finish. We use ultra-fine refractory flour mixed with a liquid colloidal silica binder to capture micro-details without bridging delicate geometry. A flawless primary layer prevents metal penetration and surface pitting during pouring, which is essential when producing high-integrity components through our 17-4 PH investment casting precision stainless steel service.
- Backup Slurry Coats: Subsequent dips prioritize structural integrity and mold permeability. These layers use slightly coarser slurries formulated to build wall thickness quickly while maintaining enough green strength to withstand dewaxing pressures.
Critical Dipping Controls
To ensure consistent coverage without trapping air or leaving bare spots, our dipping routine adheres to strict operating parameters:
- Immersion & Manipulation: We lower the wax assembly smoothly into the slurry tank, rotating and tilting the tree to displace air pockets in deep pockets, blind holes, and tight radii.
- Drainage & Runoff: After lifting the tree from the slurry, controlled manipulation allows excess liquid to drain back into the tank, leaving a uniform wet film across the entire surface without pooling in corners or thinning along sharp edges.
- Viscosity Maintenance: Slurry tanks operate under continuous mechanical agitation to prevent refractory settling. We continuously monitor slurry viscosity with flow cups, making precise binder additions to compensate for evaporation and maintain exact coating thickness.
Step 3: Stuccoing — Building the Refractory Structure
Immediately after dipping, we deposit refractory sand onto the wet slurry film. Stuccoing is where our mold gains mechanical bulk, thermal stability, and structural integrity. Applying dry aggregate to the wet binder anchors the slurry in place, prevents runoff, and builds the wall thickness needed to withstand molten metal pressures.
Whether we are coating standard injected patterns or delicate 3d printed wax patterns for rapid investment casting, matching the right application method to the specific layer is critical:
- Rainfall Sanding: We drop refractory grains through a gentle mechanical shower. This method protects the fragile primary layer and ensures uniform coverage without disturbing delicate features or packing sand too aggressively into tight corners.
- Fluidized Bed Sanding: We suspend dry sand in an upward stream of low-pressure air. This creates a liquid-like bath that penetrates deep recesses, undercuts, and blind contours on complex secondary coats.
Grain Progression Across Shell Layers
In our investment casting shell building process, dipping and stuccoing work as a step-by-step gradient to balance surface finish with structural rigidity:
| Layer Stage | Grit / Mesh Size | Primary Material | Core Function |
|---|---|---|---|
| Face Coat (Primary) | Fine (80–120 Mesh) | Zircon / Fused Silica | Captures crisp surface detail and eliminates metal penetration. |
| Transition Coat | Medium (50–80 Mesh) | Alumino-silicate / Mullite | Bridges fine surface sand to coarse structural layers. |
| Backup Coats | Coarse (30–50 Mesh) | Mullite / Fused Silica | Rapidly builds mold thickness, hoop strength, and gas permeability. |
We apply sand until the wet slurry reaches complete saturation. Avoiding bare spots or sand clumping at this stage is mandatory; uniform particle packing ensures the shell maintains consistent thermal expansion during dewaxing and pouring.
Step 4: Drying — Curing Each Layer Before the Next Coat
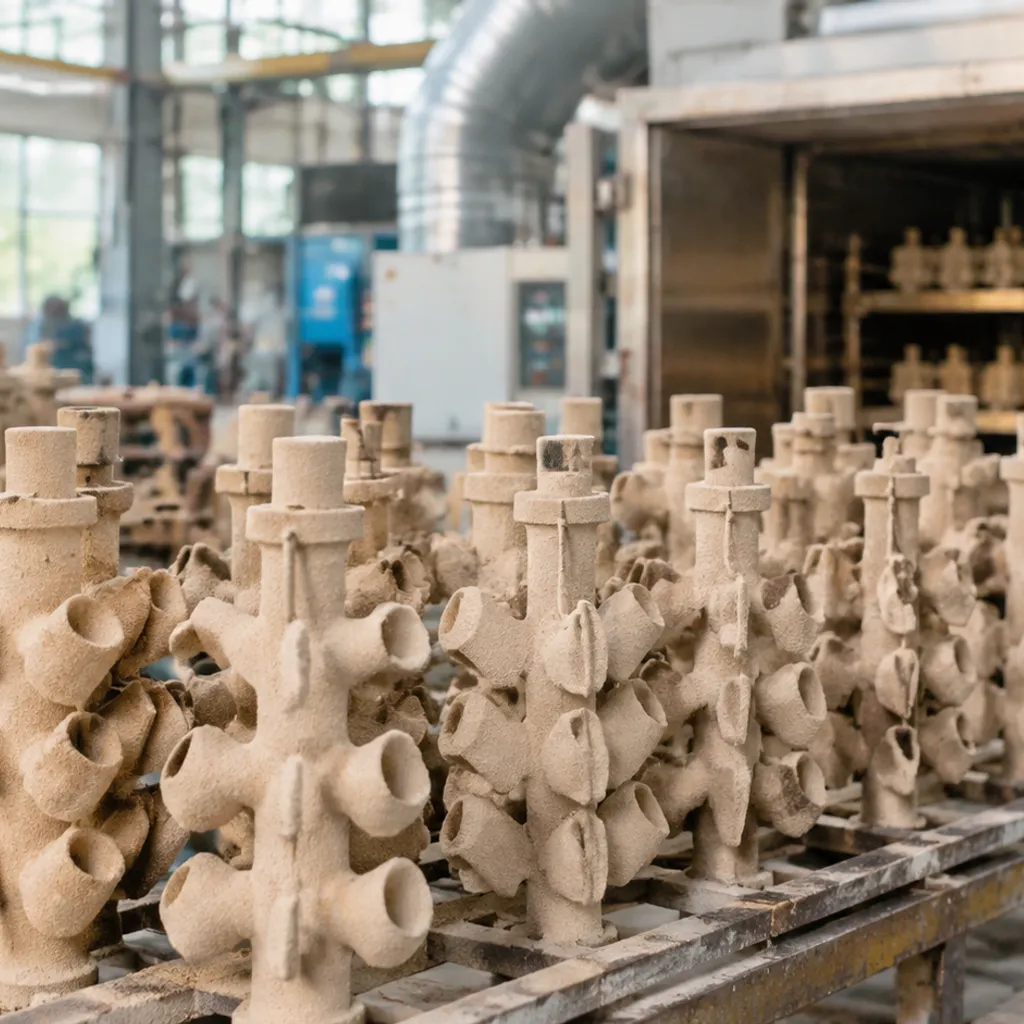
Drying is the most critical stage of the investment casting shell building process: dipping, stuccoing and drying. Applying refractory sand creates the mold framework, but controlled moisture removal is what turns that wet slurry into a rigid ceramic structure. We allow the water to evaporate at a regulated pace so the colloidal silica binder gels properly, locking the refractory grains into a rock-solid bond.
Rushing this stage is the fastest way to ruin a mold. If an inner coat remains damp when the next layer goes on, trapped moisture will cause delamination, shell cracking, or catastrophic mold failure when pouring molten alloys for 4340 steel casting high-strength custom components.
Key Drying Parameters We Monitor
To prevent wax expansion and ensure uniform bonding across intricate contours, we keep tight parameters across the drying room:
- Relative Humidity (RH): Typically kept between 45% and 55%. If humidity drops too low, the shell surface dries too fast and cracks; if it sits too high, drying stalls.
- Controlled Airflow: Laminar air movement across the trees strips the boundary layer of moisture without creating dry spots or uneven shrinkage.
- Ambient Temperature: Maintained in a narrow range (usually 20°C to 24°C / 68°F to 75°F) to prevent the wax pattern inside from expanding and splitting the green ceramic shell.
- Primary vs. Backup Drying Times: We dry the primary face coat under gentler airflow to preserve fine surface details. Backup coats handle higher air velocity, though each successive dip requires longer drying times as the ceramic wall thickens.
Only after a layer is thoroughly dried and set do we advance the assembly back to the dipping tank for the next cycle.
Repeating Coats to Build Ceramic Shell Thickness
A single layer of ceramic cannot hold up against the thermal shock and metallostatic pressure of molten metal. To give the mold its structural integrity, we repeat the cycle—dipping, stuccoing, and drying—multiple times until the ceramic shell reaches the exact wall thickness needed for casting.
How many coats we apply depends directly on the geometry of the part, total pour weight, and the alloy being poured. For instance, smaller components or specialized pours like A356 aluminum investment casting require fewer layers than heavy, high-temperature steel components. Most production runs cycle through 4 to 8 total coats.
Standard Multi-Layer Coat Progression
To achieve both high surface detail and mechanical strength, the refractory materials transition from fine to coarse as layers build up:
- Primary Coat (Face Coat): We apply a single coat using ultra-fine refractory flour (such as zircon) and fine stucco (typically 80–120 mesh). This layer captures fine part details and sets the casting surface finish.
- Intermediate Coats (Layers 2–3): A transition phase using slightly coarser sand (around 50–80 mesh) to bond tightly with the primary coat while initiating structural buildup.
- Backup Coats (Layers 4–7): We switch to higher-viscosity secondary slurries and coarse refractory aggregates (30–50 mesh mullite or aluminosilicate). These layers build wall thickness quickly and provide the bulk strength and permeability needed during burnout and pouring.
- Seal Coat (Final Layer): A dedicated slurry dip with no sand applied. This final wash seals the shell surface and locks down any loose stucco particles so they cannot fall into the mold cavity and cause inclusions.
| Layer Stage | Slurry Viscosity | Stucco Grit | Primary Objective |
|---|---|---|---|
| Primary (Face) | Low (fluid) | Fine (80–120 mesh) | Surface finish & detail replication |
| Intermediate | Medium | Medium (50–80 mesh) | Stress transition & mechanical bonding |
| Backup | High (thicker) | Coarse (30–50 mesh) | Shell thickness, rigidity & permeability |
| Seal Dip | Low–Medium | None (Slurry only) | Traps loose sand & smooths the outer mold |
Critical Rules for Layer Buildup
- Match Drying Times to Coat Depth: Backup coats carry thicker slurry and heavier sand, which trap moisture longer. We extend drying cycles on outer layers to prevent moisture pockets from being sealed inside the shell wall.
- Monitor Stucco Adhesion: Each dip must be stuccoed immediately while the slurry is wet. If the slurry skins over before sand hits it, the layers will delaminate during dewaxing or metal pouring.
- Control Shell Weight: Uniform shell wall thickness ensures even heat dissipation during solidification, reducing the risk of shrinkage defects and thermal cracking.
Common Shell Defects and Priority Troubleshooting Steps
Even with tight controls, issues can show up during the investment casting shell building process. When we troubleshoot shell quality on the shop floor, we focus on four core defects first:
- Slurry Run-Off and Uneven Thickness: This usually points to low slurry viscosity or insufficient drain time after dipping. Check your slurry viscosity and adjust your draining angle before moving to the stuccoing step.
- Incomplete Stuccoing Coverage: Blind spots or pockets on complex wax geometries often miss refractory sand grains. We check the fluidized bed air pressure or rainfall sander flow to make sure particles reach every recessed area.
- Spalling and Delamination Between Coats: When ceramic layers peel apart, the previous coat was likely too dry or contaminated before the next dip. Verify your drying intervals and keep your work environment free of airborne dust.
- Thermal Stress Cracking: Rapid temperature shifts during drying cause the interior wax pattern to expand faster than the brittle ceramic shell. Keep ambient temperature and relative humidity steady across every drying cycle.
Catching these variables early prevents costly scrap during dewaxing and metal pouring. You can explore how we maintain strict process consistency across our production lines on our manufacturing facility overview.
Manual vs. Automated Shell Building
Choosing between manual labor and robotics defines the consistency of your ceramic molds. In the investment casting shell building process: dipping, stuccoing and drying, repetitive execution controls final casting quality.
While manual handling works for short runs or rapid prototyping, scaling up demands strict mechanical precision to eliminate operator-induced variations.
Key Operational Differences
- Dipping Angle and Speed: Manual dipping often leads to uneven slurry drainage and air entrapment in deep pockets. Robotic arms enter and exit slurry tanks at programmed angles and rotation speeds, guaranteeing 100% slurry coverage without air bubbles.
- Stucco Uniformity: Applying sand manually with a handheld rainfall sander or manual fluidized bed can result in localized thin spots. Automated systems rotate the assembly precisely within the stucco zone to build a uniform wall thickness.
- Cycle Time and Drain Control: Drain times must be identical from coat to coat. Robots hold and articulate heavy wax trees with exact dwell times, avoiding thick wet edges that crack during drying.
- Ergonomics and Safety: Wax assemblies gain considerable weight with every layer. Automation eliminates worker fatigue and minimizes the risk of dropping or cracking fragile ceramic shells.
| Factor | Manual Shell Building | Automated Robotic Shell Building |
|---|---|---|
| Consistency | Operator-dependent; prone to layer variation | Fixed program; identical coat thickness |
| Defect Rate | Higher risk of slumping and air voids | Minimized shell spalling and delamination |
| Throughput | Limited by physical fatigue and shift hours | Continuous 24/7 operation with environmental sync |
| Best Suited For | Low-volume prototypes, R&D trials | Production-scale orders, complex structural components |
Leveraging robotic lines allows us to lock in shell integrity, improve yield, and pass these core technical advantages directly into critical industrial and structural applications.
Investment Casting Shell Building Procurement Guide
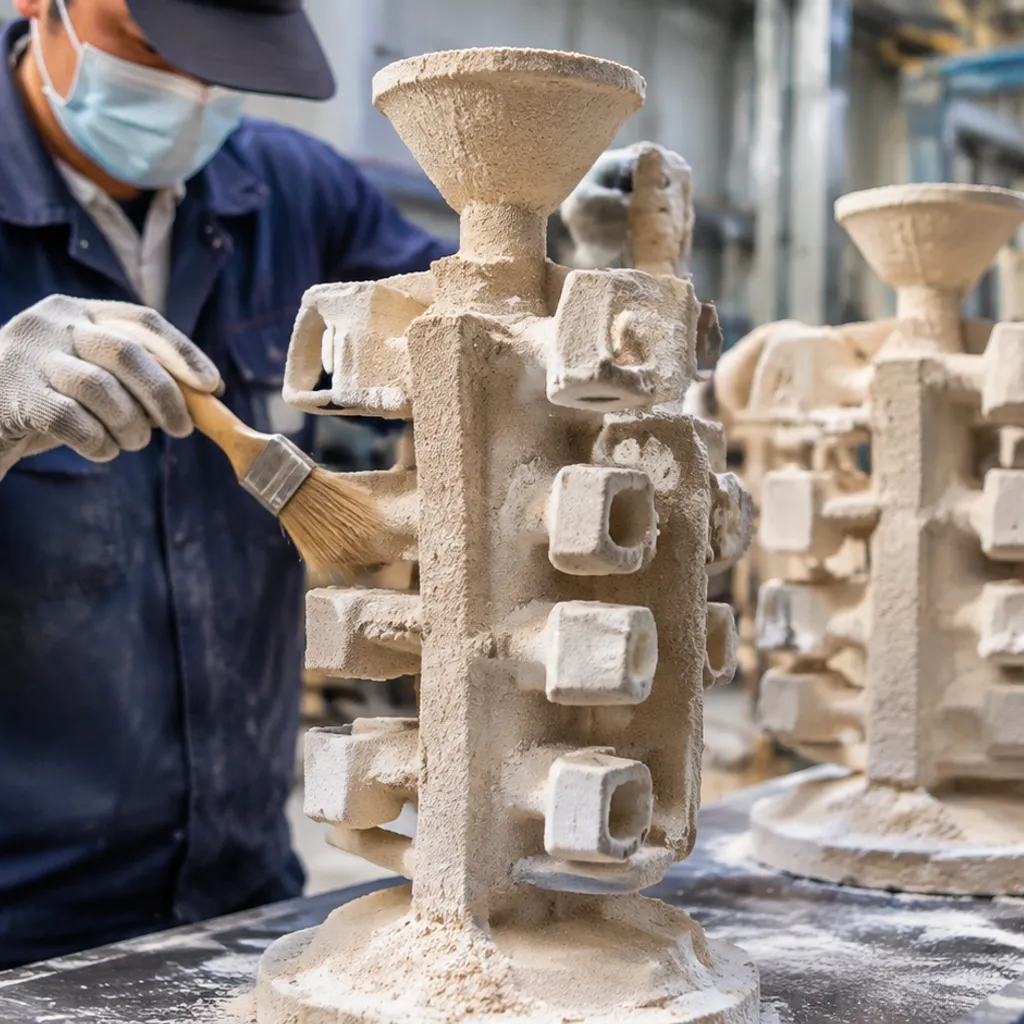
Evaluating a foundry's investment casting shell building process: dipping, stuccoing and drying controls tells you everything you need to know about their final part quality. A casting is only as sound as the ceramic mold that holds it. When you audit a supplier or prepare a request for quotation (RFQ), focus directly on how they manage their dipping, stuccoing, and drying operations.
Key Audit Points for Shell Room Operations
- Slurry Monitoring & Control: Verify that the supplier logs viscosity, slurry temperature, and binder pH at scheduled intervals. Uncontrolled slurry yields non-uniform face coats and surface inclusions, which are unacceptable for demanding aerospace investment casting for precision components.
- Stuccoing Methods: Look for automated rainfall sanders on primary coats and fluidized beds on backup layers. Even stucco distribution prevents weak spots, run-out, and shell buckling when pouring dense metals such as alloy steel investment casting grades.
- Drying Room Climate Controls: Ensure drying bays utilize automated monitoring for relative humidity (RH), ambient temperature, and controlled laminar airflow. Rushed drying between coats is the primary driver of catastrophic shell cracking and delamination during dewaxing.
- Automation Level: Automated robotic dipping cells deliver repeatable shell wall thickness, uniform dwell times, and consistent draining angles across production runs compared to manual handling.
Quick Supplier Evaluation Checklist
| Audit Area | What to Look For | Red Flags |
|---|---|---|
| Primary Coat Quality | Dedicated zircon or fused silica face coats with ultra-fine mesh stucco | Coarse stucco applied directly to wet face coats; visible air bubbles |
| Environmental Control | Constant temp (20–25°C) and controlled RH (40–60%) across drying cycles | Open-air drying on the foundry floor with uncontrolled humidity swings |
| Batch Traceability | Documented coat counts, slurry batch records, and drying hold times per tree | Missing shell build sheets or visual estimation of drying completion |
Summary: Controlling the Process, Not Just the Equipment

Investing in automated robotic cells and high-end slurry mixers is only half the battle. A truly robust investment casting shell building process: dipping, stuccoing and drying relies on tight, systematic control over environmental variables, material chemistry, and drying cycles rather than just the machines themselves.
When you learn how dipping, stuccoing and drying build a consistent investment casting shell, you realize that scrap reduction happens inside the shell room long before metal reaches the pour basin. To see how these mold standards integrate into broader component manufacturing, explore our aluminum investment casting guide for precision parts.
To lock in consistency across production runs, we focus on three core disciplines:
- Slurry equilibrium: Monitor viscosity, binder solid content, and slurry temperature continuously to maintain predictable wetting and coat thickness.
- Stucco application: Verify particle sizing, air pressure in fluidized beds, and curtain density in rainfall sanders to prevent bald spots and weak layers.
- Drying room stability: Maintain strict control over relative humidity, ambient temperature, and laminar airflow so each layer cures fully without thermal shock to the wax assembly.
Achieving zero-defect casting starts with treating the shell building sequence as an interdependent physical and chemical system from the initial prime dip to the final seal coat.
Frequently Asked Questions
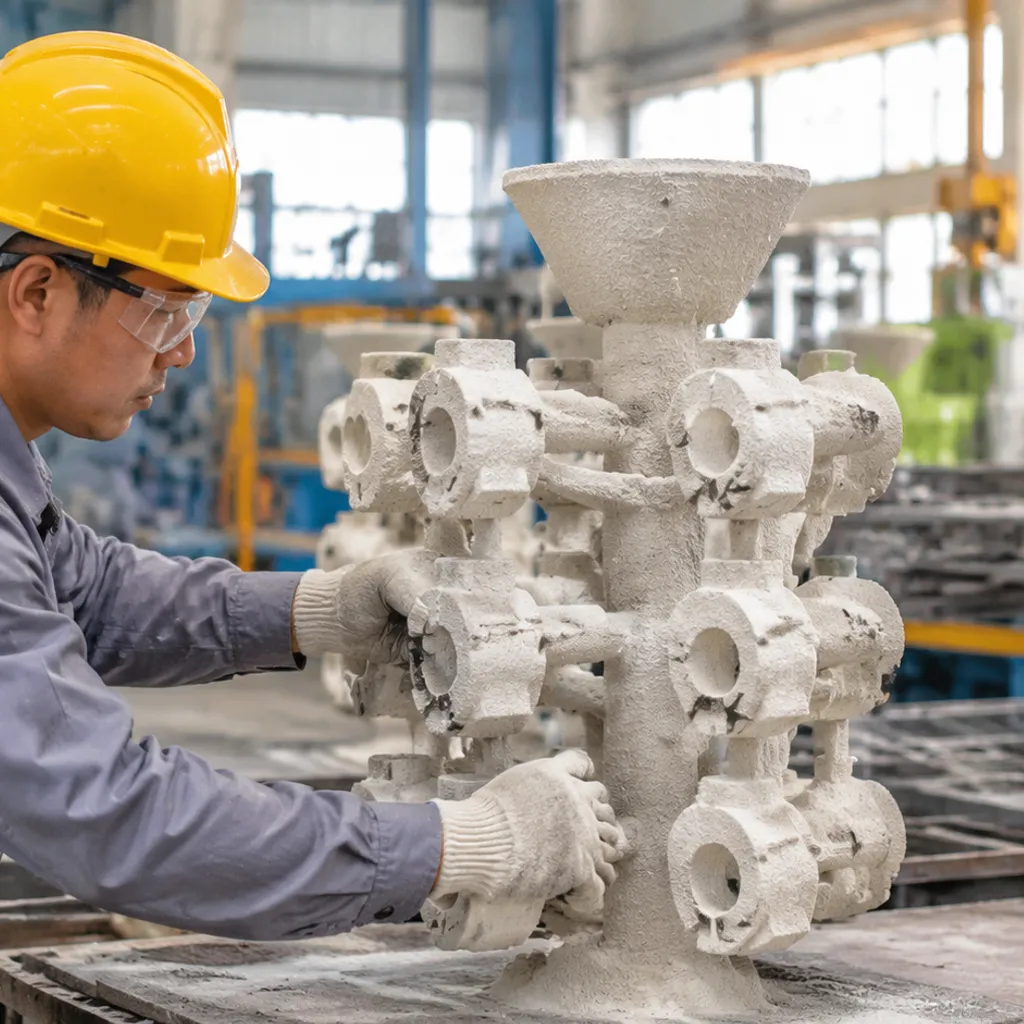
What is the investment casting shell building process?
The investment casting shell building process: dipping, stuccoing and drying is the step-by-step method of creating a rigid, heat-resistant ceramic mold around an assembled wax pattern tree. We repeatedly immerse the wax cluster into a liquid refractory binder slurry, deposit refractory sand grains over the wet layer, and allow each coat to dry under controlled airflow. This sequence creates a durable ceramic shell capable of holding molten metal without leaking or shifting.
How long does investment casting shell drying take?
Drying times vary based on the specific layer, binder chemistry, and environmental controls:
- Primary (face) coats: Typically require 4 to 8 hours under gentle air circulation to ensure fine surface details lock in without cracking the delicate wax underneath.
- Backup coats: Usually take 2 to 5 hours per coat when managed with optimized relative humidity and steady laminar air velocity.
- Final seal coat: Generally cures for 12 to 24 hours to achieve maximum green strength before entering the dewaxing stage.
How do you prevent ceramic shell cracking?
Shell cracking typically stems from uneven drying stresses or premature wax expansion. We keep shells intact by controlling key parameters:
- Environmental stability: Maintain tight control over temperature and relative humidity to ensure the ceramic slurry cures evenly from the inside out.
- Proper stucco grading: Transition smoothly from fine refractory sands on the face coat to coarser grains on secondary coats to absorb mechanical stress.
- Eliminating slurry pooling: Rotate the assembly thoroughly during draining to prevent thick, wet pockets of slurry that crack during dehydration.
- Fast heat transfer during dewaxing: Ensure rapid pressurization in the autoclave so the outer wax layer melts before the bulk pattern expands against the shell walls.
How is slurry viscosity controlled?
We monitor and manage slurry viscosity through systematic testing and constant mechanical agitation:
- Regular cup testing: Use standardized flow cups (such as Zahn or Signature cups) at set intervals to track drainage time in seconds.
- Evaporation compensation: Add deionized water or colloidal silica binder in precise amounts to balance liquid lost to ambient shop air.
- Continuous tank rotation: Keep slurry mixers running 24/7 to prevent heavy refractory flours from settling at the bottom of the reservoir.
When should a foundry switch to automated shell building?
Moving from manual dipping to an automated shell coating application makes financial and technical sense when your operation faces any of the following demands:
- High production volumes: Running consistent, repeatable cycles without operator fatigue or bottlenecking the foundry line.
- Heavy or complex assemblies: Handling large cluster weights that are difficult for technicians to manipulate and drain evenly.
- Strict quality standards: Eliminating operator-to-operator variance in dipping angles, drain times, and stucco distribution to dramatically lower part rejection rates.
Internal Linking Plan for Shell Building Operations
To streamline production beyond the investment casting shell building process: dipping, stuccoing and drying, we connect every critical stage of mold development across our manufacturing resource network.
- Upstream Pattern Tooling: Consistent ceramic shells require stable pattern assemblies. Exploring our wax injection machine application helps your team control pattern shrinkage, eliminate assembly distortion, and set the baseline for reliable primary slurry adherence.
- Process Automation: Upgrading from manual dipping tanks to consistent multi-coat production relies heavily on programmable robotics. Implementing a specialized robot integrator application standardizes slurry drainage angles, controls stucco rainfall distribution, and guarantees uniform shell wall thickness across every cycle.
 English
 Russian
 German