

2026年11月4日
Solve wax injection machine troubleshooting issues with expert tips on pressure temperature mold filling and maintenance for reliable casting results

Clogged Nozzle and Poor Wax Flow Troubleshooting
When a wax injection machine fails to deliver a steady stream of molten wax, the culprit is almost always thermal drop, particulate buildup, or an incorrect valve balance. In our shop, we treat poor wax flow as a priority diagnostic step before touching mold setups or clamp pressures.
Checking and Clearing Injector Nozzle Blockages
A sudden drop in wax output usually points to a solidified plug or foreign matter directly behind the orifice.
- Inspect the nozzle tip: Check for hardened wax skin caused by ambient drafts or an unheated nozzle tip adapter.
- Clear mechanically: Use a soft brass wire or dedicated nozzle cleaning pin sized precisely to the orifice diameter. Never use hardened steel needles or drill bits, as they scratch the internal seat and ruin sealing surfaces.
- Perform a manual purge: Increase injection pressure momentarily to blow out dislodged debris into a waste container, clear of any production molds.
Diagnosing Heating Band and Nozzle Temperature Faults
Even when the main tank displays the correct melt point, localized cold spots at the dispensing point choke the wax flow.
| Checkpoint | Target State | Diagnostic Action |
|---|---|---|
| Nozzle Heater Band | Uniform warmth across housing | Measure resistance with a multimeter; replace open-circuit bands. |
| Nozzle Thermocouple | Real-time reading matches surface temp | Verify with an external digital contact thermometer directly at the tip. |
| Heater Junctions | Tight, corrosion-free leads | Tighten terminal posts and inspect for melted insulation or shorts. |
If the wax string freezes instantly as it leaves the nozzle, increase the independent nozzle temperature controller by 1°C to 2°C increments until the flow streams smoothly without smoking.
Cleaning Contaminated Wax and Tank Filter Screens
Recycled wax, airborne shop dust, and degraded wax residues accumulate at the bottom of the reservoir, starving the intake.
- Drain the tank fully: Run the reservoir low, drain the molten material through the bottom port, and discard the dross at the base.
- Scrub the intake filter screen: Remove the stainless mesh screen located above the delivery valve. Wash it thoroughly with a compatible solvent or heated ultrasonic bath to clear clogged pores.
- Refill with clean charge: Melt virgin pellet wax or thoroughly filtered reclaimed wax to prevent immediate repeat contamination.
Adjusting Back-Pressure and Wax Flow Valves
Improper pneumatic delivery pressure or restricted mechanical needle travel starves the injection chamber.
- Check system line pressure: Confirm your pneumatic regulator supplies a steady, unfluctuating line pressure into the tank assembly.
- Set the flow control needle: Back out the mechanical flow control screw in quarter-turn increments. If set too tight, it physically blocks the stroke of the internal shut-off pin.
- Balance tank back-pressure: Keep tank pressure sufficient to push wax up to the nozzle seat without creating turbulence or air entrapment in the delivery chamber.
Fixing Air Bubbles and Porosity in Wax Patterns
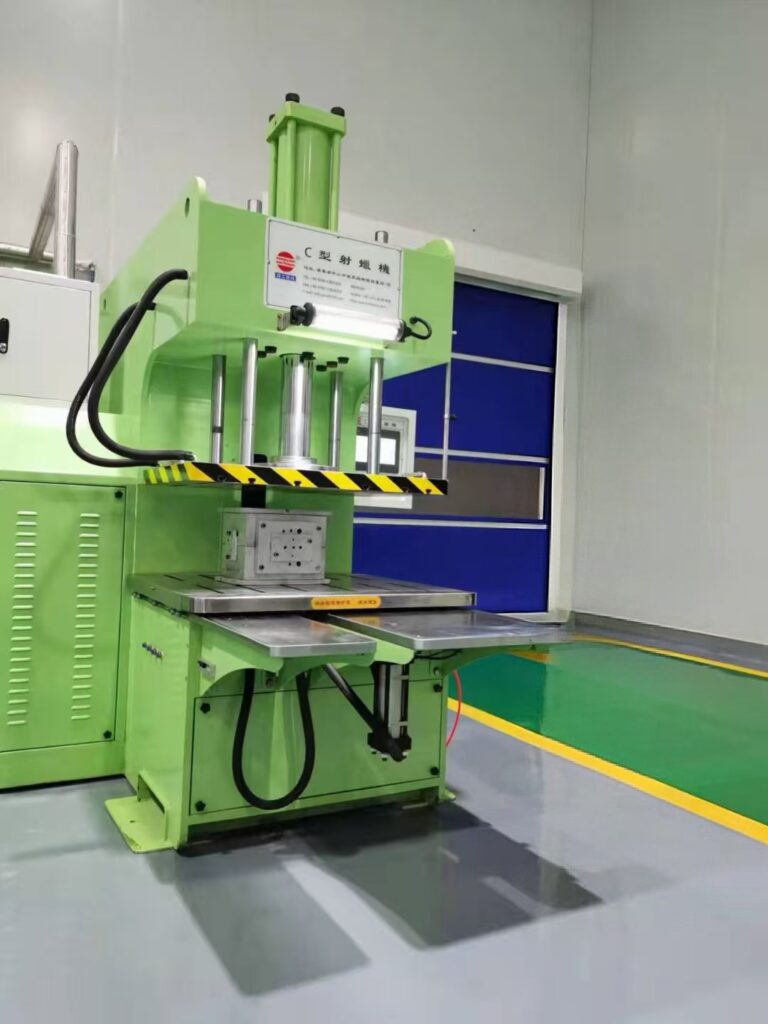
Trapped air ruins pattern detail and creates costly rework downstream. In our shop, resolving wax pattern air bubbles comes down to controlling the vacuum, the clamp, and how the liquid wax fills the cavity. If you are handling wax injection machine troubleshooting for porous parts, run through these core mechanical and pneumatic checks immediately.
Checking Vacuum Chamber Seals and Auto-Clamp Pressure
When air pockets show up repeatedly, the vacuum system is almost always losing suction or fighting uneven clamping.
- Inspect the chamber gasket: Check the rubber seal around the vacuum hood or chamber door. Any cracks, dry rot, or stray wax bits break the negative pressure seal before the shot even starts.
- Diagnose auto clamp wax injector problems: If the clamp cylinder applies uneven pressure, air leaks in through the mold parting line. Check your pneumatic gauge to ensure the clamp piston maintains steady force without pressure drops during the cycle.
- Verify pull-down speed: Watch the vacuum gauge on the unit. If the needle does not drop into full vacuum within 2 to 3 seconds, replace worn seal rings or service the vacuum valve.
Adjusting Injection Speed, Dwell Time, and Fill Rate
Forcing wax in too fast causes turbulence, while injecting too slowly allows the front of the melt to freeze and trap pockets of air. Maintaining tight control over your injection parameters is critical to maximizing the advantages and disadvantages of lost wax casting across production runs.
- Lower injection speed: High velocity churns the wax flow, whipping air into the cavity. Dial back the forward flow control valve for a smooth, laminar fill.
- Increase dwell time: Keep the nozzle engaged under steady holding pressure for an extra 1.5 to 3 seconds. This feeds liquid wax into cooling areas and prevents shrinkage voids.
- Balance the fill rate: Use just enough primary injection pressure to reach the thinnest sections without blowing past the mold vents.
Venting Rubber Molds Properly to Release Trapped Air
Even top-tier injectors cannot force wax into a mold if trapped air has nowhere to escape.
- Cut micro-vents: Use a clean scalpel to add shallow, diagonal cross-cuts running from deep cavity pockets toward the outer edge of the mold. Make sure these cuts stop just short of the outside border to avoid flashing.
- Clear clogged vents: Check existing vent slits for compacted wax chips or talc buildup that stops air evacuation.
- Check mold alignment: Warped molds squeeze vents shut when clamped. Keep aluminum backing plates flat and rigid across both mold halves.
Monitoring Wax Tank Degassing and Moisture Levels
Porous wax often traces back to contaminated or aerated raw material inside the reservoir.
| Diagnostic Check | Problem Indicator | Immediate Workshop Fix |
|---|---|---|
| Tank Degassing | Fine micro-bubbles visible on the liquid wax surface | Run the tank vacuum cycle for 20 minutes before shooting patterns. |
| Moisture Contamination | Sputtering sound at the nozzle tip during injection | Drain the reservoir, wipe out condensation, and refill with dry wax beads. |
| Agitator Speed | Frothy wax near the top heating zone | Reduce mechanical stirring speed to prevent whipping ambient air into the melt. |
Solving Incomplete Fills and Wax Pattern Shrinkage

Incomplete patterns, non-fills, and sink marks are among the most frequent issues we see in daily production. When dealing with short shot wax injection defects, the culprit is almost always an imbalance between fluid delivery, thermal transfer, and pack pressure.
Increasing primary injection pressure and holding time
When wax fails to reach fine filigree or distant corners, we first look at the pressure cycle. Boost primary pressure: Increase your pneumatic wax injector pressure in small steps (typically 0.2 to 0.4 bar / 3 to 6 psi). Avoid massive jumps that blow out parting lines. Lengthen dwell time: If you release mold clamp pressure too early, molten wax recoils from the cavity. Adding 1.5 to 3 seconds of holding time ensures the injection force keeps feeding material until the gate freezes shut, stopping wax pattern shrinkage defects at the core.
Calibrating wax reservoir temperature for proper viscosity
A couple of degrees can completely alter your wax flow characteristics. If the wax is too cold, high viscosity blocks flow; if it is overheated, the volumetric contraction creates deep surface depressions. Check tank temperature with an external digital probe—onboard digital displays often drift over time. Keep injection wax within its optimal liquid-plastic state (usually between 68°C and 74°C depending on formula). For detailed adjustments on thermal contraction and dimensional recovery, check our technical guide on fixing wax pattern shrinkage in complex molds to stabilize tight tolerances.
Optimizing mold chill time and sprue gate sizing
The sprue must always remain liquid longer than the casting pattern so it can feed the cooling wax. Enlarge undersized gates: Widen the main sprue channels by 15% to 25% if thick pattern sections show recurring cavitation. Control chill cycles: Do not strip the mold immediately. We allow sufficient mold contact time so the pattern stabilizes internally, preventing structural warping during ejection.
Preventing premature wax freezing in thin pattern sections
Thin edges and micro-prongs often freeze mid-flow if the mold pulls heat away too quickly. Pre-condition rubber and metal molds: Never shoot into cold molds straight from storage; run several dummy cycles to stabilize the mold at ambient shop temperature (22°C to 25°C). Increase initial injection velocity: Ramp up the front-end fill speed to drive the liquid front to the extremities before skinning begins.
Stopping Wax Leaks and Constant Nozzle Dripping
Constant dripping at the injector tip creates a mess, ruins cycle times, and causes severe rubber mold wax leakage along the parting line. When tackling wax injection machine troubleshooting for continuous leaks, we focus directly on mechanical sealing surfaces, needle stroke alignment, and tank pressure control.
Replacing Worn Nozzle O-Rings and Seat Washers
High operating temperatures and thermal cycling degrade elastomeric seals rapidly. A degraded O-ring or deformed washer prevents the nozzle assembly from sealing tightly under internal head pressure.
- Inspect the nozzle seat: Shut off tank pressure, cool the injector down, and unscrew the nozzle tip. Check for hardened, flattened, or cracked fluoroelastomer (Viton) O-rings.
- Clear debris from the seating face: Even a tiny speck of carbonized wax will prevent a flush seal. Clean internal mating surfaces thoroughly. Machine components built with corrosion-resistant 400 series stainless steel resist pitting and seat wear far better against continuous heat.
- Install high-temp replacement seals: Never use standard nitrile rubber rings. Always replace them with high-temperature, wax-compatible seals rated for continuous service above 100°C (212°F).
Adjusting Shut-Off Needle Valve and Return Suction
If wax oozes between cycles even with brand-new seals, the shut-off needle stroke or suction mechanism is out of balance.
- Recalibrate needle stroke length: Check the pneumatic actuator driving the shut-off needle. If the needle does not bottom out cleanly against the internal taper, adjust the stroke adjustment nut until the needle seats firmly without binding.
- Set the return suction (suck-back): Most modern pneumatic systems feature a reverse-draw or snuff-back stroke to pull excess molten wax slightly backward into the nozzle orifice the moment the injection cycle cuts off. If dripping persists, increase the suck-back air pulse duration in 0.1-second increments until the nozzle tip stays dry between shots.
- Check for needle wear: Inspect the needle taper for grooves, scratches, or uneven wear patterns. A scarred needle will bypass wax regardless of air cylinder pressure.
Inspecting Wax Tank Gaskets and Pressure Relief Valves
Pneumatic leaks around the reservoir compromise internal fluid dynamics, leading to erratic pressure spikes that force wax past safety boundaries.
- Check lid gasket integrity: Inspect the tank perimeter silicone gasket for hardening, splits, or wax contamination along the clamping channel. A compromised seal causes unstable tank pressure drops during cycling.
- Test the pressure relief valve: Ensure the mechanical safety relief valve moves freely and releases cleanly at the factory-specified limit. A sticking or gummed-up valve can trap excessive residual pressure inside the reservoir, continuously pushing wax past the shut-off needle.
- Examine pneumatic fittings: Spray leak-detection fluid on tank inlet fittings and regulators to ensure stable operating pressure during both active clamp and standby modes.
Eliminating Pattern Flashing and Mold Parting Line Gaps
Pattern flashing and unwanted parting line seams ruin fine details and waste hours of clean-up time at the bench. When molten wax forces its way between mold halves, it usually comes down to a mechanical imbalance between holding force and injection force, or a misaligned mold setup.
Balancing Clamp Cylinder Pressure Against Injection Force
In any wax injection molding machine, the auto-clamp cylinder must generate enough mechanical force to resist the hydraulic pressure of the incoming liquid wax. If your clamp pressure is too low, the mold faces separate the fraction of a second wax fills the cavity.
- Check the pressure ratio: Ensure pneumatic clamp pressure is set significantly higher than injection pressure—typically at least 2 to 3 times greater depending on the mold surface area.
- Inspect the clamp piston seals: Leaking cylinder seals bleed holding force during the shot, allowing the mold plates to back off under peak load.
- Level the clamping plates: Uneven contact plates create localized gaps along parting lines even if total cylinder pressure reads normal.
Checking Rubber Mold Alignment and Locating Pins
Worn, deformed, or dirty rubber molds will produce flash regardless of machine settings. We inspect these physical components whenever rubber mold wax leakage appears:
- Inspect interlocks and locating buttons: Damaged or rounded registration pins allow mold halves to shift horizontally under pressure.
- Remove wax debris and grit: A tiny particle of cold wax trapped on the mold face prevents full contact, creating an instant flash point along the parting line.
- Verify mold flatness: Older vulcanized rubber molds warp over time. Replace warped rubber frames or back the molds with rigid aluminum plates to keep parting lines dead flat.
Lowering Excessive Injection Pressure Settings
Blasting wax into the cavity with brute force rarely solves fill problems; instead, it blows past parting lines and distorts thin sections.
- Dial back primary injection pressure: Lower the injection PSI in small increments until flashing stops while the pattern remains fully filled.
- Rely on fill speed over raw force: Increase injection flow rate slightly instead of spiking raw pressure to carry wax into fine filigree.
- Fine-tune forward dwell time: Cut dwell time down to eliminate the secondary pressure surge that pushes wax between seated rubber faces right after cavity filling completes.
Wax Injection Machine Troubleshooting: Pressure Fluctuations and Vacuum Errors

Unstable pressure and weak vacuum pull will ruin an entire production batch before you even spot the defect. When our shop runs into short shots or trapped air, we trace the pneumatic lines and vacuum circuits immediately. Maintaining consistent pressure directly impacts pattern density, ensuring you capture the detailed surface finish that represents a primary advantage of investment casting over green sand casting.
Diagnosing Pneumatic Solenoid Valve and Regulator Failures
Inconsistent injection force usually traces back to sticky valves or worn pressure regulators. We isolate these pneumatic wax injector pressure faults using a simple checklist:
- Regulator drift: Watch the primary gauge during injection. If pressure drops by more than 0.2 bar (3 psi) during the shot, the regulator diaphragm is fatigued or clogged with debris.
- Sticking solenoid valves: A delayed injection pulse or erratic clamp release points to gummed-up spools inside the 3-way or 4-way solenoids. We clean the internal spool with electrical contact cleaner or swap the coil if it runs abnormally hot.
- Air leaks around fittings: Spray soapy water around push-in fittings and manifold blocks while under pressure to catch micro-leaks that sap driving force.
Testing Vacuum Pump Oil Levels and Suction Performance
Vacuum wax injector issues usually start at the pump. If your vacuum gauge fails to pull down to -0.09 MPa within three to five seconds, check these key areas:
| Diagnostic Check | Normal Condition | Fault Condition & Fix |
|---|---|---|
| Pump Sight Glass | Clear, amber oil at mid-level line | Milky or dark oil: Water/wax contamination. Drain and replace oil immediately. |
| Suction Intake | Strong, immediate pull at mold face | Weak draw: Clean the inline mesh filter; clear hardened wax chips blocking the vacuum port. |
| Exhaust Mist Filter | Free-flowing, minimal back-pressure | Clogged filter: Causes pump overheating and slow draw cycles; replace the exhaust element. |
Purging Moisture and Oil from Compressed Air Supply Lines
Wet, dirty compressed air destroys internal seals, causes pressure stutter, and contaminates molten wax inside the reservoir.
- Drain water traps daily: Empty all auto-drain bowls and filter-regulator-lubricator (FRL) units at the start of every shift.
- Check desiccant dryers: Saturated desiccant beads allow water vapor to enter the pneumatic lines, causing solenoid valves to rust and stick internally.
- Install an oil coalescing filter: Place a 0.01-micron coalescing filter right before the machine air inlet to capture aerosolized compressor oils that degrade internal rubber seals and spoil wax pattern purity.
Routine Maintenance to Prevent Wax Injection Machine Downtime
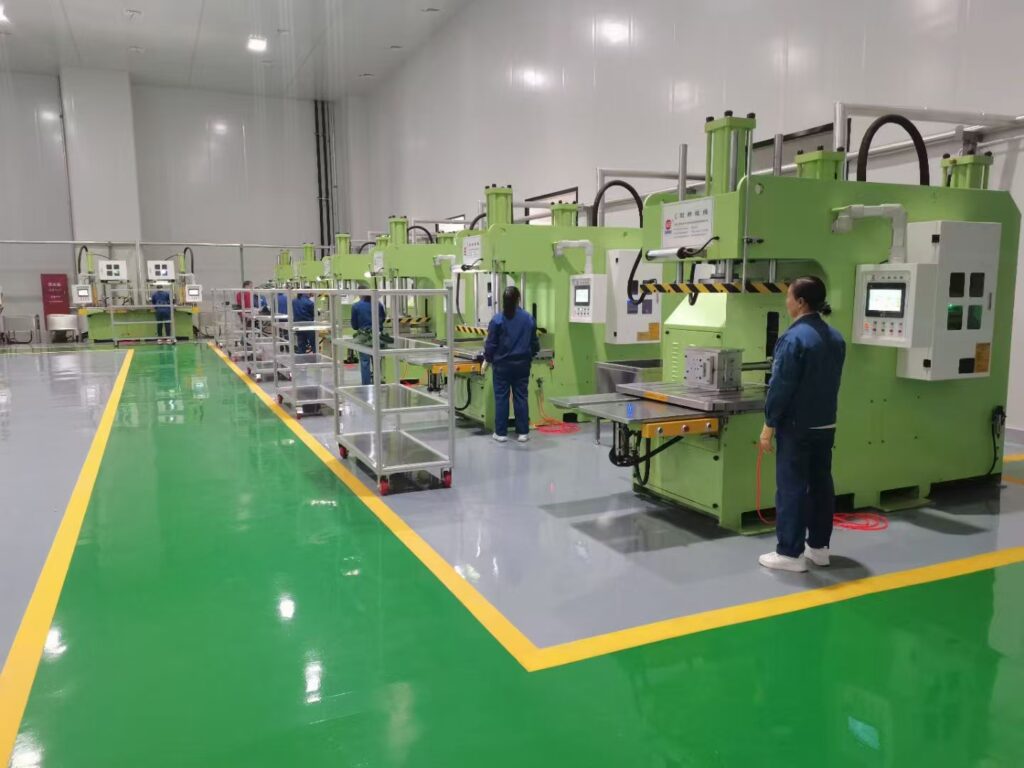
Proactive maintenance cuts out sudden breakdowns and avoids costly wax injection machine troubleshooting during mid-run production. We run our injectors on a rigid schedule to keep pattern dimensions repeatable and production moving without surprises.
Daily Wax Tank Flushing and Nozzle Purge Routine
Old, degraded wax inside the nozzle assembly creates partial clogs and flow inconsistencies. We execute this sequence at the start and end of every shift:
- Purge the nozzle: Inject 2 to 3 dummy shots at operating temperature to blow out stale or oxidized wax trapped in the nozzle tip.
- Clear the nozzle orifice: Wipe the exterior nozzle tip with a lint-free brass scraper while hot. Never use steel picks that scratch the seating cone.
- Filter drain check: Empty the inline sediment trap or drain plug at the bottom of the reservoir to remove sediment before it circulates into the delivery chamber.
Weekly Inspection of Pneumatic Lines and Moving Seals
Air pressure instability ruins clamp lockup and injection timing. Every week, we check pneumatic supply points and dynamic joints:
- Drain water traps: Bleed compressed air filters and auto-drains. Moisture in pneumatic cylinders accelerates solenoid corrosion.
- Leak check air fittings: Spray soapy water or use an ultrasonic leak tester around quick-connects, regulator blocks, and clamp air lines to catch micro-leaks.
- Inspect moving seals: Check clamp cylinder shafts, auto-clamp guide rods, and nozzle shut-off piston seals for scoring or grease wash-out. Lubricate sliding posts with high-temp pneumatic cylinder grease.
| Frequency | Target Assembly | Action Item | Tolerance / Standard |
|---|---|---|---|
| Daily | Injection nozzle | Hot purge & tip clear | Free of char and carbon crust |
| Weekly | Pneumatic regulator | Drain moisture & check pressure | Set delivery at workshop spec (+/-0.2 bar) |
| Weekly | Auto-clamp guide rods | Clean & apply synthetic grease | Smooth travel with zero binding |
| Bi-Annual | PID temperature probe | External digital pyrometer cross-check | Within +/-0.5°C of target |
| Bi-Annual | Pressure transducer | Master gauge verification | Calibration within 1% full scale |
Bi-Annual PID Temperature Sensor and Pressure Gauge Calibration
Digital readouts drift over time as heating elements cycle and pressure regulators wear. Maintaining exact pattern tolerances is one of the essential casting process guide methods and key steps that saves raw material and scrap metal downstream.
For digital wax injector calibration, we submerge a secondary calibrated digital thermocouple probe directly into the core of the molten wax pool, comparing actual wax temperature to the digital PID controller readout. If the offset exceeds 1°C, we re-tune the temperature controller input offset parameter.
Next, plumb an analog master reference test gauge inline after the primary pneumatic regulator. Step the regulator through low, mid, and high pressure points to ensure real output matches the screen values, preventing under-injection short shots or flash leaks caused by uncalibrated pressure spikes.
Wax Injection Machine Troubleshooting FAQs
Hands-on diagnosis solves most daily production stalls. Here are straightforward answers to the common problems we encounter during daily wax injection machine troubleshooting on the workshop floor.
What is the ideal temperature setting for jewelry wax injection?
Most commercial injection waxes perform best between 68°C and 74°C (154°F to 165°F), but the exact target depends on your wax type:
- Carving and hard waxes: Require higher heat, generally 71°C to 74°C.
- Flexible and filigree waxes: Flow best between 66°C and 69°C.
- Nozzle differential: We always set the nozzle temperature 1°C to 2°C higher than the main wax reservoir to prevent needle freeze-up and flow resistance.
When configuring a wax injection machine for investment casting, verify your digital wax injector calibration using an external surface probe. Built-in gauges can drift over time, causing hidden viscosity shifts.
Why does my wax pattern distort when ejected from the mold?
Pattern warpage happens when the pattern is mechanically pulled before the core has fully solidified:
- Insufficient dwell/chill time: The wax skin looks solid, but the molten core yields under pressure during peeling. Add 2 to 4 seconds to your hold cycle.
- Uneven mold clamping: Over-tightening pneumatic clamps squashes the rubber cavity. When the clamp releases, the rubber snaps back, bending the fresh pattern.
- Excessive injection temperature: High heat extends shrinkage duration and softens the pattern. Drop reservoir temperatures by 2°C increments.
- Lack of release agent: If the wax sticks to the rubber walls, apply a light, dry PTFE or talc powder dusting instead of wet sprays that trap air.
How do I know if my injector vacuum pump is failing?
Vacuum wax injector issues usually point to pump degradation or vacuum line leaks. Watch for these failure signs:
- Persistent air bubbles: If patterns show rounded voids at pattern tips despite clean venting channels, the chamber is not pulling a deep enough vacuum before injection.
- Slow pull-down speed: An operational pump should draw down the mold chamber to -0.08 to -0.09 MPa within 2 to 3 seconds. Sluggish pull indicates worn vanes or failing check valves.
- Contaminated oil: Check the pump sight glass. Cloudy, milky, or brown oil means wax vapors and condensation have degraded pump lubrication.
- Continuous motor strain: If the vacuum pump motor hums loudly without reaching cut-off pressure, inspect the intake filter for wax mist blockage.
What causes rough or wavy surfaces on injected wax models?
Wavy flow lines, cold shuts, and stepped textures on wax models mean the liquid wax stream froze before packing out the cavity:
- Cold rubber molds: Cold molds freeze the wax skin immediately upon entry. Keep molds at an even room temperature or pre-warm them slightly between cycle runs.
- Low injection velocity: If your pneumatic wax injector pressure drops mid-shot, the molten wax front hesitates, leaving distinct ripple marks.
- Moisture in compressed air lines: Water vapor carried through the pneumatic lines causes micro-sputtering at the nozzle tip. Drain water traps daily and service desiccant dryers.
Selecting the right setup prevents these defects from the start; reviewing how to choose the right wax injection machine helps ensure your pneumatic volume and nozzle heating match your workshop's production requirements.
 English
 Russian
 German